Pages

Thursday, March 29, 2012

Before and After

Before . . . .


 . . . and AFTER!!


I can't believe my BABY GIRL got braces today!!  Sniff.

Wednesday, March 28, 2012

All Aboard!

The Dinosaur Train!!

A few weeks ago, I mentioned that Snacks (the cutest boy in the world) had a birthday coming up this month and that his FAVORITE show right now is Dinosaur Train, so I was looking for some inspiration for his party.  It's a really cute show and arguable has THE BEST theme song of all the kids shows on TV right now!  If you haven't seen it, you can check it out at PBSkids!

I looked around Pinterest (of course) and found lots of dinosaur cakes and train cakes, but nothing that was Dinosaur Train, so I had to come up with my own CRAZY creative plan!  And despite a few hitches along the way (stay tuned!), it went great and everyone had a great time - most importantly, the birthday boy!!


It's such nice weather right now, and hasn't gotten too hot yet for an outdoor party, so I decided to turn our porch into "Pteranadon Station" and have activities in the house and yard, just like the stops on the train!


Guests were directed to the train station with a note on my chalkboard sign by the door and some dinosaur tracks stenciled in the grass and on the driveway.


I grabbed some leftover spray paint from my Valentine's KISS project for the yard and Sheep was able to use the stencil and some chalk for the driveway.  She LOVES prepping for parties almost as much as I do (Looks like dad, acts like me I always say!) and she did a fantastic job!!


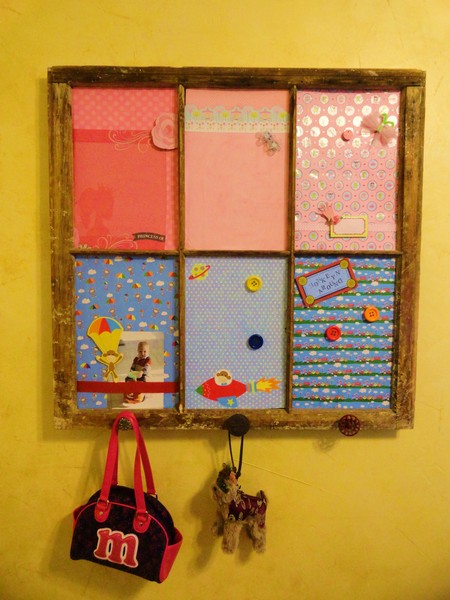
She also helped me with the signage for the Dinosaur Nursery.  Notice anything amiss??  Wish I could say that was her misspelling, but it was mom's!  I guess a Master's degree just isn't what it used to be - ha!

We shopped all of our local party stores for Dinosaur Train party supplies, but ended up having to order plates and napkins online.  I also took a coloring page from PBSkids that had buddy on it and traced the image of buddy onto a sheet of paper, enlarged it and copied it with the words "Birthday Buddy" to make a template for the Triassic T-Shirt Craft!


For this craft, I used the tutorial from Lil Blue Boo and a bottle of Citra-Solv to transfer the image onto t-shirts for the kids to color.  This was not as simple as it looked, but I ultimately got it to work and I'm intrigued enough to try again on some other projects, so stay tuned!!!  We used Crayola fabric markers to color the t-shirts - so much fun and a great party favor too!


The Jurassic Jumping Ground presented another one of the 'wrinkles' in this party plan.  I had asked a good friend of mine if I could borrow her bounce house and she happily agreed.  I had been to her daughter's carnival birthday and seen a HUGE bounce house there so in my mind, that's what I was borrowing.  When she told me I could pick it up in my CR-V, I should have realized there was a 'little' problem.  But I was so busy with the other party plans, that I didn't blow it up until Saturday afternoon about 2 hours before the party - only to discover then that it was TOO SMALL for the older siblings to use without potentially damaging it!!  Ackk!!


Speed saved the day by finding a 'full-sized' bounce house that could be delivered in time for the party!  And the little ones had fun in the borrowed bounce house as well!  I do love him!!!


He also 'fixed' my Dinosaur Nursery that, after an afternoon of weeding, tilling, prepping and adding 10 bags of sand, wasn't nearly ready to hide eggs!  It was a stroke of genius though and so easy to do with Easter just around the corner! 


Sheep and I filled eggs with candy and small dinosaur figurines from the dollar store and then buried them our vegetable garden-turned-sandbox for the kids to dig and find!  I purchased small sand pails with shovels from the dollar store (along with some dinosaur stickers) for this activity so the kids could take home their loot in their buckets!


All of the kids LOVED this activity and spent the rest of the party in the sandbox - so much easier than a pinata at this age!


Best of all, Snacks and Sheep have a 'new' sandbox to play in for the summer!


I saw TONS of train cakes on Pinterest, most of which were much better attempts than mine turned out to be, but at least it tasted good!  And two-year-olds are notoriously good at overlooking the decorations in favor of candy!!  In this case, Skittles leftover from Sheep's Art Party did the trick!  And it worked with the Dinosaur Train figurines I got for our own little 'Buddy's' birthday!


Burgers, babies, beautiful weather (don't forget beer) and bouncing until the sun went down . . .


Birthday fun for everyone!!


Happy Birthday Snacks!
Mommy and Daddy love you more than words can describe!


Sassy Sunday Blog Hop # 8

Oops!

It's not Sunday is it?!

I know we're half-way through the week, but I just couldn't muster the energy it was going to take to blog before today.  Have you ever had a weekend like that?  Last weekend definitely was for me.  I spent ALL DANG DAY in the yard on Thursday and Friday prepping for Snacks' birthday party - which was SO AWESOME - despite a few hitches.  But more on that later.

Let's get on with hop, as there's still two more days to link up and maybe even get featured!  A big thanks to all of you who party with us each week, sharing such great projects and making blogland a fun place to stop and shop!  You always inspire me!

Last week we had a really GREAT giveaway from
Dedra at Prettiful Designs! It is a $10 digital gift certificate!!
I hope that everyone popped over to say "HI!" to her!!

The winner with the MOST VIEWS was
Kate over at A Creative Cookie with her GIANT Tulle Bow!
 
 
CONGRATULATIONS!!!!!!
 
Now I want to feature a couple of projects that really caught my eye this week!!
 
First was the FAUX WALLPAPER over at
How awesome is this?? Can't find the perfect wallpaper...NO PROBLEM!!
 
 
Second was Rhonda's Easter Glass Block
Super simple, yet CUTE!!!

 
This week there were some SUPER DUPER posts full of information!!! If you did not get to look at them, you should go back and take a look!!
 
You know the rules!


Friday, March 23, 2012

Window Pane to Picture Frame

The title has such a nice ring to it, don't you think!
Too bad I can't say the same about the rest of this project . . .


I spied this antique window pane in Canton back in my single lady 'daze' and knew it was just the piece my shabby chic little duplex in Cowtown needed!  Back  in my 'cabbage rose sofa' days (you know what I'm talkin' about!) it was used to display demitasse cups and saucers in my dining room.  When my job took me south on I-35, it hung above an antique pie safe and was adorned with paper roses.  Once Speed and I tied the knot and moved into our home, it decorated my kitchen and displayed antique linen hand towels (so stinkin' cute btw) Soon after though, it's presence was needed upstairs in our new little Sheep's bedroom, where my father's baby clothes would come to hang on satin hangers from it's panes.  This little 'Friday Find' has served me well over the years and it's a piece I have grown to love and cherish like part of my family!  So I knew that it needed to be incorporated into the JV squad's bedroom redo in some way, but how??

Sheep has long since outgrown the baby clothes on the window pane and was using it to hang tutus and fairy wings instead, but I have had my heart set on turning into a picture frame (even before Snacks came on the scene) so with the bedroom redo in progress, it was time to figure something out!

My idea was to cover pieces of tin cut to fit into the panes with fabric or paper so that I could use magnets to change the pictures.  Sounds easy enough, right??

Sooooo wrong!!!

My first trip to the big box hardware store (frown) got me back home with a roll of flashing - aluminum flashing - that WASN'T magnetic!  Too bad I didn't realize this until  I had already cut out the first piece so it couldn't be returned (frown).

On my trip back to attempt the return it hit me that we had a large piece of insulating foam core in the garage that I could use as my inserts instead!  My revised idea was to simply paint the pieces with 'magical' magnetic paint and then paper over them.  Even better right??  Because the foam core would just wedge into the panes without even needing top be tacked in somehow - yay!!

BOO!!

The Rustoleum Magnetic Paint was a complete bust in my opinion.  It doesn't work!  Let me repeat that - IT. DOESN'T. WORK!!  Too bad I didn't figure that out until I had already covered the pieces with scrapbook paper, which in itself was 2 trip ordeal!!


Despite my measuring and cutting out the foam core pieces the night before, it never dawned on me that the panes were larger than a 12 X 12 sheet of scrapbook paper . . . until I got home with them and tried to put them on - grrrr!


Back to the scrapbook store only to discover that not one, not two, but THREE of the papers I chose were the last sheet of that paper, which meant I had to come home and do some pretty crafty piecing together to even get my panes covered.  Sooooo disappointing when I tried to hang up my pictures with the cute little button and otherwise embellished magnets.  As you can see, the magnets stick, but they cannot hold up a photo.  Not even a sheet of notebook paper (insert sad face here)!!!

I even went surfing through blogland in an attempt to salvage this project somehow, some way and came across a bloggy sistah who had been thwarted by magnetic paint found ceramic magnets at Radio Shack that worked on job when regular magnets did not . . . But no, trip number FIVE for this project did not solve the problem.


With a soon-to-be-two year old sharing the room, I really don't want to use pushpins and they will make permanent holes in the paper (not to mention the pictures) anyway.  So, I am still searching for a solution.


I love the way the project looks, especially with the last minute addition of the door knobs across the bottom to add some always-needed storage in a shared space.  Too bad it can only hold one picture underneath the ribbon.
Any ideas?
I'd love to hear them!

Sharing this sassy project at Schoolhouse Scraps, Ladybird Ln., 

Wednesday, March 21, 2012

Easter Bunny Pie!

Hippity Hoppity - Easter's on it's way!

And what to do with all those Chocolate bunnies come Monday?
Make Easter Bunny Pie of course!


If I remember correctly, this recipe was 'discoverd' by my sister-in-law on the back of the Carrot Patch Pete Easter Bunny left in her basket one year - by the Easter Bunny himself of course!  And this pie is so yummy, it's become an Easter tradition around here.  In fact, we usually don't wait for the bunnies to appear in the baskets to make it and just grab a bunny or two at the grocery store instead so we can enjoy this pie on Easter Sunday!

Easter Bunny Pie

1 6 oz. milk chocolate bunny
18 large marshmallows, cut in half
1/4 C milk
16 oz. unsweetened whipping cream
1 graham cracker pie crust
Set aside left ear for garnish (If you can . . . Snacks was 'helping' in the kitchen so that poor ear didn't have a chance). 
'This is for me, right mom?"

Break remaining bunny into small pieces.  Melt bunny and marshmallows together.  Add milk and stir until smooth.  Let cool completely.  Meanwhile, whip cream until stiff peaks form.  Fold into cooled chocolate mixture.  Spoon into crust and chill until firm (usually 2-3 hours). Garnish with chocolate shavings from the ear.


Now if you look closely, you can tell that I've made at least one change to this recipe - I used a flaky pastry crust rather than a graham cracker crust.  Mostly because I didn't have any graham crackers handy yesterday, but also because I wanted to see if the pastry crusts that I had in the freezer from my strawberry icebox pie a few weeks back really held up when you thawed then later.

It worked beautifully!  And I promised to share the recipe if I decided it was a keeper, and I think it is, so here you go!

Flaky Pastry

5 C flour
2 C shortening
1 Tablespoon brown sugar
1 Tablespoon vinegar
1/4 teaspoon baking powder
1 egg, beaten
1 1/2 teaspoons salt
Water

Sift dry ingredients together.  Cut shortening into dry ingredients until mixture is the consistency of course meal.  Combine vinegar and egg and add enough water to make 1 Cup of liquid.  Add liquid to dry ingredients and mix until dough forms a ball.  Divide dough and pat out with hands into desired shape on waxed paper.  Smooth with rolling pin.  For a baked shell, prick with fork and cook at 450 degrees for 12-15 minutes.  Dough will keep several months in freezer tightly wrapped.  Yields 5or 6 9" crusts.

I made a couple of other changes as well.  I used a mixture of dark and milk chocolate bunnies because I wanted to amp up the chocolate taste and I prefer dark chocolate.  I also added a teaspoon of Mexican vanilla to my filling as well - just 'cause.  It's what I do!

Hoppy Easter Y'all!

Sharing this sassy recipe at Savvy Southern Style, Delightful Order, Somewhat Simple, The Brambleberry Cottage, Glue Talks and Stuff & Nonsense, Serendipity & Spice

Monday, March 19, 2012

Coat Rack Reconfigured

I told you that we were busy little bees during Spring Break!   I had lots and lots on my "to do" list and my BFF drove into town with plenty of her own as well!  This coat rack redo was one of her 'Friday Finds' and I must say - it's BRILLIANT!!

Right now, my ribbon is stored in boxes and bins and none of it is easily accessible.  And that can be so frustrating when my creative juices are flowing!  It actually did spend 24 hours in organized heaven on this coat rack turned ribbon holder  (just long enough to shoot some pictures) but despite my begging and pleading, it headed back to Big D on Saturday (insert sad face here).


Oh well - it's given me something specific to shop for while I'm junkin' in jammies!  And if you have no idea what I'm talking about right now, you can see for yourself here!

My BFF is the original 'Damsel in Distressed' and will paint and sand anything that gets in comes her way!  For this project, she chose a bright pink paint from Sherwin Williams called Raspberry Parfait - isn't it yummy?!


Prior to sanding and painting, we bought inexpensive wooden dowel rods that would accommodate the spools of ribbon and cut them a couple inches longer than the width of the rack.  Oh, and don't forget to bring a spool with you when you go to pick out your dowel rods.  This step is important.  Don't ask me how I know - just trust me!  Then we used a level to mark where we wanted our rods to go on either side.  A few holes later, and we were ready to paint!


She preps and distresses with an electric hand sander.  It gives all of her projects a rough and rustic sort of feel - very shabby chic!  She also uses flat paint on her projects, though I personally prefer a finish that has a little more sheen to it - either satin or eggshell.  I have also been reading all over blogland about Annie Sloan chalk paints, but haven't seen them anywhere to try them yet.  What do you prefer?  And if you've used Annie Sloan's paint and/or wax, I'd love for you to leave me a comment or send me an email about why you like them so much - or don't for that matter!

In the mean time,  I cannot wait to find a coat rack of my own!!
Happy Hunting Y'all!

Sunday, March 18, 2012

Gimme a (Spring) Break!

Well bloggy friends, it's been a cr-A-zy, fun, BUSY week off!  I just LOVE, LOVE, LOVE having both my babies home - it's such a treat to get to spend time with Sheep and makes me (and Snacks) excited for summer!  I can't wait!

And this week was extra special because my BFF and her beautiful daughter decided to spend their week off with us too!  She is so special to me!  We met back in 5th grade while I was visiting a mutual friend of ours for the summer and the rest, as they say, is history!!


As usual, we had more ideas than time for our week-long 'staycation' but we actually got quite a bit accomplished and I am quite proud of us!  She has as much paint in her hair and hot glue in her veins as I do, so when we get together, nothing is safe!  Seriously, sit still too long around us and you're likely to get 'repurposed' yourself!  In fact, we spent the better part of the week repurposing the tools in Speed's garage for our own craft-errific projects and they are so stinkin' cute!!!

Here's a sneak peek at one of them!  Can you guess what it was/is?!

We also managed to shop for a prom dress, squeeze in a trip to the World's largest Livestock Show and Rodeo, spend a day at the beach and hit a few garage sales for some FABULOUS Friday Finds!!  About the only thing I didn't have time for was blogging!
{grin}
But I have no regrets!!  In fact, my sincere prayer for each of you is that you give yourself a (Spring) break too and have as much fun as we did!  After all, these days are precious and I don't want to miss a minute of them!  Before the end of the month, my baby will be two and Sheep will be in BRACES!!  And come August my best friend's beautiful baby girl that I held in my arms on the day she was born will be graduating from high school (a year early I might add)!!  These days are precious indeed.

Sassy Sunday Blog Hop # 7 and Digital Design Giveaway

Before we get on with  the party, I have some BIG NEWS to share!!  We have changed the Pinup Girls Playdate to an all day Saturday event, so please take a look at the new information below! It is going to be a BLAST!! Don't let having to fly stop you from joining us, I have found some really cheap airfare and if you're not afraid to 'rough it' I can offer you some cheap (free) accommodations as well!  In fact, I am sitting in them right now out at the track!  It's Speed's first race of the season btw, and he's already won three first and two second places!  He's quite the big fish in his tiny little racing pond.

But I digress . . .

The Pin Up Girls Playdate has moved to Saturday!

Pin-Up Girls don't just pin it - we 'DO' it!!


Join 'Miss January' (Randee Hallmark) and
'Miss October' (Jennifer Rollins) for a
Pin-Up Girls Playdate

Saturday, May 5, 3012

from 10 am - 5 pm

in Clear Lake, Texas

at Scrapbook by Design

This fun-filled day of

Home 'Pinspiration'

will include

projects using burlap, painting, stenciling, distressing techniques and more!!

Cost is only $95.00 per person and includes:

A Pin-licious lunch and unlimited snacks

4 PINTABULOUS PROJECTS

Door prizes, swag and unlimited fun!!

Not only will you leave with 4 pinteresting projects for your home,
you'll learn creative techniques that you can use over and over again
to keep your inner Pin-Up Girl satisfied!

Registration and payment can be made through PayPal
using the send money feature and a credit card

(You do not have to have a PayPal account to use this feature)

Money can be paid to sassypantstutus@att.net.

More details about projects will be posted soon, so follow us and don't miss a thing!
If you have any other questions or would like to speak with one of the pin-up girls directly,
we'd love to hear from you, so send us an e-mail!
Randee Hallmark: bclynx1@aol.com
Jennifer Rollins: sassypantstutus@att.net

This week we are having an AWESOME giveaway from Dedra at Prettiful Designs! Dedra designs digital papers, clip art, kits, templates, and word art. She is giving away a $10 digital gift certificate!! I would LOVE to have it!  In fact, I need it - mamma needs some buttons for her blog LOL!

The top two features this week are AWESOME and ADORABLE!!!

The first one stopped me in my tracks...I LOVED everything about it!! Rosina over at Rosy~Posy made me happy that SPRING has SPRUNG with her rainboot flower pots!

garden boots

Noreen over at Crafty Journal made the cutest "chick" ever! I "LUB" him!! ;)


This weeks giveaway will be based on whose link was viewed the most and please, please, please follow your hostesses if you aren't - we have tons of ways to do that these days, so pick one already!  Otherwise, you know the  rules.  And let's see some more Easter inspiration - my mantle needs help!!