Pages

Showing posts with label summer. Show all posts

Wednesday, June 26, 2013

Copycat Pottery Barn Buffet


This project began as an amazing find by my bestie, who just so happens to work at an apartment complex and is in a position to grab see all the 'stuff' people leave behind when they move!  She knew that I had been looking for something small to use as a buffet for my back porch transformation and when she saw THIS:
 
 
Well, she knew that it was just what I needed!
 
With her help, I initially sanded it down and painted it white, but I wasn't really happy about how it looked against the brick on the house.  It sort of just blended in and the cottage-style table I had refinished for the dining area was also white.  Ugh - boring!
 
Here's the only picture I can find of it in white, but you can get a feel for what I'm talking about.  At this point, I was also still trying to figure out what to do with the missing drawer front . . .
 
 
And then I spotted THIS beauty in the Pottery Barn catalog last summer and was inspired!
 
 
So . . . I stripped off the white on the top and stained it a dark walnut.  Then I painted a coat of ochre on the doors and sides before covering everything but the inset panels of the doors with a bright green.
 
 
I distressed the whole thing with my sander so that the various colors would show through and rubbed the whole piece down with the leftover stain, to give it a more aged/weathered appearance.
 
 
Just like my flag project, I was able to use paint samples (and already had the white), so this project cost me very little to complete.  Certainly much less than the $999 price tag on the PB inspiration piece!  Here they are side by side.  What do you think?!
 
 
I solved the drawer problem by removing the drawer altogether, painting the inside and using two wicker baskets on the inside instead!  They work great and I didn't lose any functionality of the space!  The baskets were about $7 each.
 
 
I did change the handles on the piece as well, which were regularly $5 each at Hobby Lobby, but since I waited for a sale - I got them both for $5 instead!
 
 
It's turned out to be such a cute and serviceable piece that I just love it!  And with 100 degree weather predicted this weekend, we'll be spending all our time out back (in the pool) enjoying it too!
 
Happy summering y'all!
 

Wednesday, August 22, 2012

Stenciled Burlap Wall Art Tutorial

Back in the Spring, when I was 'Junkin' in Jammies', I practically stole acquired some great old frames that I had no idea what I would do with, but knew that I could not pass up!  One of them turned into a sassy little message board for my kitchen and a much larger one I set aside for a back porch art project.  And there it sat, through June, July and most of August, while the kids and I busied ourselves with all things summer!  Truth is, I knew I wanted to do something on burlap, but I was a little stumped about what I wanted it to say.  But with summer coming to an end and our back-to-school prep in full swing - it hit me!


Voila!

The PERFECT wall art for our favorite summertime destination:  our own backyard!

This project was quick, easy and fun to do - so here's how ya get 'er done!

Supplies:

Frame of your choice
(I chose plastic since it was going outdoors!)
Craft paint - pick your color
Small brush
Burlap
Thin piece of wood cut to fit
(You can have that done at your local home improvement store if
you can't slow Speed your husband down long enough to do it
and they'll do it for free!)
 Spray adhesive
Poster board
Craft knife
Paint pen (optional)

For the Frame:

Remove any inserts in the frame and cover your work area to paint.  This happens to be my dining room table - ha!


Using a small brush and craft paint, apply a small amount of paint to your brush and brush across frame.  I use recycled meat trays for easy, disposable paint trays.


This 'dry brush' technique allows some of the color underneath to show through.  This technique works well on frames with lots of molded detail.  I considered painting another color underneath first, but I liked the gold.


Let dry completely before inserting your art!

For the Insert:

Lay your burlap out with your wood that has been cut to fit on top and trim burlap close to the edges of the wood.  Spray wood with adhesive and then cover with burlap, working from the center out to smooth out any wrinkles as you go.  It took more adhesive than I thought it would . . .


For the Stencil:

This might be another 'ghetto graphics' tutorial, but it worked for me without a lot of headache (but a fair amount of hand-ache) by the time I was done.  There are plenty of other stenciling techniques out there, but this made the most sense to me for some reason.

First decide on your phrase and font style.
Then print them out on your computer using your word processing program.


Geesh - Looks like someone needs a pedi!
Anyhoo, once you like the size and layout, grab your poster board.
I simply affixed my lettering to the poster board with good old-fashioned Scotch tape.


Looks good!  Now cut through the letters and the poster board using your craft knife.
I did this on a self-healing cutting mat, but if you don't have that, make sure you put something underneath so you don't ruin your surface while cutting!


Make sure you save the 'insides' on your letters for stenciling!


Does anyone else have to work in these conditions?!


Once you've completed your stencil, remove the paper and lay it out over the burlap covered insert and start to paint!


After seeing the positive ravings about Sharpie paint pens, I decided to buy (invest) in a package of them and let me just say - "I'm hooked!" 


They really do work great and made this job easy-peasy without having to worry
about bleed through since my stencil wasn't vinyl, etc.  Yay!!


Almost finished!!


Paint might have done a 'darker' job, but I'm certain it wouldn't have been as clean.


Now, just insert your burlap-covered, fabulously-embellished , one-of-a-kind wall art
into your beautiful 'new' frame and along with the last taste of summer . . .


ENJOY!!

It's Overflowing

Monday, August 13, 2012

Summer on South Padre Island

I know it seems like FOREVER since I've shared any adventures with you, but Speed and I decided to take a technology break when we left for vacation in July and let me just say - so worth it to be completely and totally present for these most precious memories! 

I had actually packed my laptop for the trip, intending to blog, but it was a seven-hour drive to our destination and somewhere along the way, we decided to turn off the computers, the e-mails, even the phones and go old school instead.  The truth is, I enjoyed it so much I've had trouble finding the gumption to get back to it!  But since my scrapbooking days seem all but over any more, I realized that blogging might be the only (semi) organized peek at their childhood my kids might have - so I'd better get busy!

We spent a month last week, I mean a week last month
{WISHFUL THINKING}
on the 'Texas Riviera', enjoying literally everything summer!

SIBLINGS!
'Bubby' lub!
SUN!
'Sun-kissed!'
SURF!
The tide was up on the last day and brought some seaweed with it,
but otherwise the beached were clear. {LOVELY}

SMILES!
Say "Cheeeeeese!"
SAND!
We didn't take the sand castle classes offered all over the island, but I think we did alright!

SEASHELLS!
The sea shells we collected were so different than any we've ever seen on Galveston Island and very cool!
We took home lots and we've got some crafty ideas for them too!

SUNSET!
We LOVE the beach at sunset!
We drove down to the north end of the island and paid the $5 to enter the 'park area'
AWAY from the condo crowds - well worth it!!

STARGAZING
No pics, but when the sun went down we spread out some quilts in the back of the truck and tried to find a few constellations.  While Snacks fell asleep, the rest of us enjoyed a view of the stars that's just not possible in the city!


SILLY!
SWAK!

SKINNY-DIPPING!
Am I the only mom who can't seem to keep clothes on her son?!

SEA TURTLES!
The Sea Turtle Rescue Center is located on So. Padre Island
and you can see all kinds of sea turtles up close and personal there! 
If you're lucky, you might get to see a hatchling release as well!

SUN BATHING!
Reading on the beach - MY personal favorite!  Like mother like daughter!

SANGRIA!
Hmmmmm . . . I guess we drank it all so there wasn't a picture, but trust me, it was good!

and a STEGOSAURUS?!
We stopped a Bobz World for souveniers on the way home.
It's true what they say - "You gotta see it to believe it!"


About the only thing we didn't enjoy was Schlitterbahn, even though we were staying at a condo with a better view of the resort than the Gulf! Don't get me wrong, we love 'the Bahn,' but at only 2 years old, we knew that a water park wouldn't really be "the Hottest, Coolest Time in Texas" for Snacks. At least not for the price. So we decided to play it by ear and only go if Sheep was beside herself, begging. Luckily, the beach and the pool seemed to satisfy her, because she didn't even ask, even though we walked past it on our way to the water every morning. {SWEET} Which means . . . . in addition to the all the food and the fun we found, we've got one more great reason to go back some day!

Friday, June 29, 2012

Bringing Summer Indoors


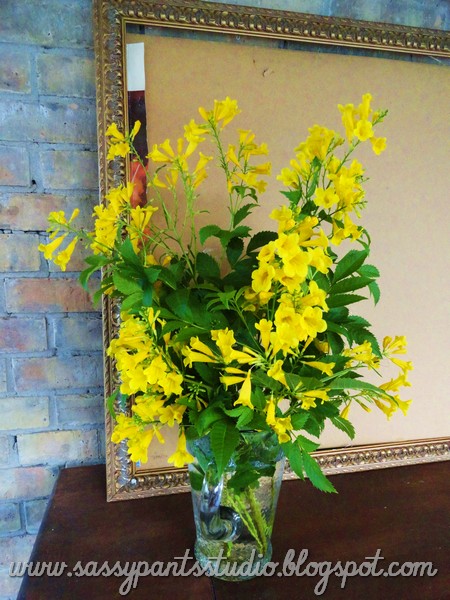
Aren't these beautiful?

They are cuttings from the Esperanzas (aka Yellow Bells) that were planted in our new landscaping out front a couple of years ago.  They grow like wildfire, require little to no watering and produce these amazing clusters of yellow, trumpet-shaped flowers almost year-round.


Because they tend to overgrow our landscape and sometimes make it hard to even see they other plants in front of them due to their willowy shoots and profuse blooms, I decided to get serious about trimming them back yesterday.


Unfortunately, that meant cutting off tons of these glorious clusters of flowers and I just couldn't bear to stuff them all in the trash.  So . . . I decided to do a little experiment and toss a bundle into some water and see how long they last!


So far, so good!


I think they look spectacular out here on the patio, atop my newly refinished sideboard that's just missing its handles before I can show it to you!  You might have also noticed my next (and almost last) patio project propped up behind it.  It's just been too hot to do much of anything outdoors other than swim here lately.  So it's nice to be able to bring a little summer indoors.


I am excited about the 'no-cost' decorating I can do for gatherings with these beautiful blossoms too!

Happy Summer Y'all!

Sharing this sassy summer idea at Wow Us Wednesdays,

Thursday, June 28, 2012

Citrus Water


Seems like I have been seeing an awful lot of posts about dieting, getting in shape and/or losing a few pounds here recently and it seems I'm in the same boat.  I've been pouting about it for months, because I was down 20 pounds and two dress sizes at Christmas after a year of hard work (Yay me!), but it just been in the last week that I've finally gotten motivated to take action . . . again (sigh).


It was also 92 degrees this morning at 9:00 AM and boy howdy is it ever hot now!!!  Either way, we could all use more water in our routine, so I decided to help myself (and my family) out with this simple trick for healthy living by putting the water front and center - of the kitchen that is!


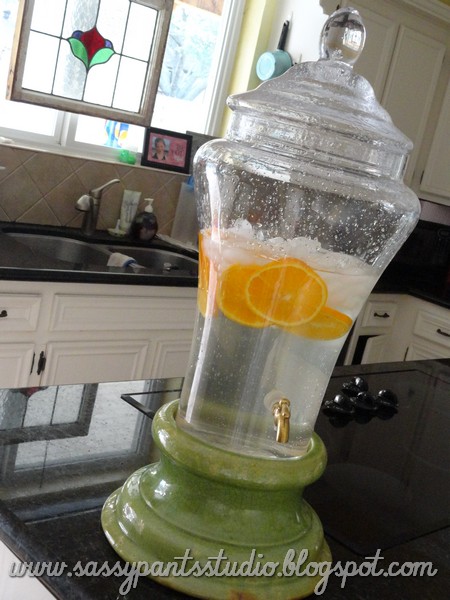
I decided to dust off my drink dispenser and, fill it with some flavored water and keep in on the kitchen island to remind myself to DRINK UP!  This fabulous, little number came from Paul Michael.  I just luuuuuv it and I am so happy to be seeing it every day instead of just during get togethers, which we seem to be having far too few of lately!


Last time we were out visiting Speed in California (where he used to go for work quite regularly), they always had fresh, citrus-flavored water in the lobby every day and we would grab a glass each time we walked through.  So simple and so yummy!


Today I simly sliced up a fresh orange and floated in my water and ice - so refreshing!  I've also used lemon, cucumber and fresh mint from my garden!  All no calorie!  All delicious! {Mmmmmm}


You might even try cantalope water.  I had it served at a conference back in February and it wasn't my cup of tea, but many of my colleagues thought it was quite yummy, so don't be afraid to experiment with new flavors to figure out what you might like best!


And did you happen to catch my latest 'find' in one of the pictures above?!  Not sure it's staying where it is right now, so I haven't decided what color I want to paint it just yet.  Suggestions?

Happy (HOT) Summer Y'all!

Sharing this sweet summer sipper at Wow Us Wednesdays