Pages

Friday, February 17, 2012

Bienvenidos a Mexico!


Last night our Girl Scout Service Unit celebrated Thinking Day at one of the local churches in town.  In case you haven't heard of World Thinking Day before, or don't remember it from your own girl scout days (Don't worry - I didn't either!!), Thinking Day is officially February 22 and is a day for girl scouts to "participate in activities with a global theme to remember their sister girl scouts and girl guides in other countries."


Each troop within our service unit was asked to pick a country that has girl scouts or girl guides and learn some things about that country that they could share with the other troops.  Booths were set up in the church hall and while half of the girls rotated around the booths with 'passports' that could be stamped at each country they visited, the other half acted as hostesses for the country we chose - sharing food, swaps and cool facts about the country.  Once the first group visited every country, then they switched groups so that all the girls had a chance to visit and to hostess.  The world tour was followed by performances or demonstrations (a song, a game, etc.) by each of the troops.


As a troop, we are very fortunate to have access to individuals and artifacts from many countries:  Italy, England, Mexico, Japan, Colombia and Canada!  We ended up hosting Mexico for our first ever Thinking Day and had only two meetings to prepare!  We are also in the midst of the 'Between the Earth and Sky' Journey, so were were desperate to find a way to combine our Journey with our Thinking Day preparations!  So, my co-leader and I spent and evening with some wine and the computer and voila!

We decided to focus on Monarch butterflies, as animals can surely be considered a natural resource AND Monarchs a journey each year (just like our crazy daisies!) all the way from Canada, through Texas and into Mexico!!!  Perfect!!


Each booth was required to have a sample of food from their country and our local Mexican restaurant was kind enough to donate rice.  Thanks Tony!!


Our girls made butterfly swaps using tulle, pipe cleaners and pony beads for the head.  So cute and so super easy to do!!  Thank goodness, because we had to make 130 of them!!


Our girls were each responsible for learning a word in Spanish or a fact about girl scouting in Mexico that they could teach each other (Journey requirement) and could share with the other scouts when they visited our booth!  For example - we discovered that the Spanish word for Daisy is Margarita!!  We won't be forgetting that one - ha!


We also had our girls dress like Daisy/Brownie scouts or 'Gacelas' by having them wear the uniform in Mexico - white shirt, dark blue pants and a yellow bandana - how easy is that?!?  We added a tissue paper flower that we made during our meeting to their hair so our Gacelas would look like flowers in a butterfly garden (learning about caring for the natural resource is another Journey requirement).  Aren't we 'clever and efficient' co-leaders?!  I think so!!


Our Daisy mom from Guanajuato, Mexico, who just so happens to be an architect as well (how lucky is that?!) volunteered to do our display board and our table display as well.  I expected something fabulous from someone so talented and we weren't disappointed!!

She also helped translate the girl scout song 'Make New Friends' into Spanish so our Margaritas could perform it at the end of the evening.  She even stayed to help serve rice and keep our 'tour guides' on track and we are just so blessed to have her!!


At our last meeting before the event, our girls made the tissue paper flowers and made tissue paper monarchs to help round out our booth decorations.  They were so simple to complete and I think the girls did an awesome job!!  Don't you?!


This was probably the first big event that our girls have had a chance to do with other troops and they all seemed to have a great time!  If you are looking for a way to celebrate Thinking Day in your area, I would encourage you to consider a 'World Tour!!'  If you celebrate Thinking Day some other way, I'd love to hear about it too!

Wednesday, February 15, 2012

St. Valentine's

I hope everyone had a Happy St. Valentine's Day yesterday.  With work, kids, and after school activities it's hard to find time to celebrate, so breakfast has become our tradition.  It's an idea I borrowed from my cousin and good friend Denise - and it seems work just fine for us!

So, yesterday we started our morning 'in the pink' so to speak, with pink pancakes (Sheep's favorite), pink milk (food color, NOT strawberry - bleck), fresh strawberries and heart shaped sausage patties I cut out with a cookie cutter.  Now even I will admit that the sausage was probably overboard.  especially for the effort to 'ahhh' ratio it received - ha!!  Otherwise, I subscribe to the KISS principle when it comes to St. Valentine's Day - Keep It Simple Sassy!  So, a book and a small stuffed animal were the only thing waiting for them at the table.  Probably what we enjoyed the most was breakfast with dad, since he usually leaves for work about the time they're getting up in the morning.

Speed and I usually 'KISS' too.  Instead of trying to find a sitter and rushing out after work to dine on an overpriced meal somewhere 'in town,' we sort of celebrated early by catching our favorite band at The Texas Music Theater in San Marcos last weekend instead.  What a great place!!  We were already making a quick road trip with Sport (the youngest on our varsity squad) to tour some Texas universities that weekend and were able to squeeze it in on Friday night!

I credit myself (ha!) for discovering this band and their heartthrob of a lead singer in Austin over a decade ago and IMHO live Texas music just doesn't get any better than Reckless Kelly.  So take a listen y'all - mmwah!!

Sunday, February 12, 2012

Sassy Sunday Blog Hop and Sweet Tooth Giveaway!

Howdy Y'all!
And welcome to the 2nd (!!) Sassy Sunday Blog Hop
AND 
Sweet Tooth Giveaway!

Once again, my partners in crime are (drum roll please . . . .)

Congratulations to Amanda at School House Scraps for her Valentine Wreath Idea!!!
So simple!!  Sooooo stinkin' CUTE!!
And you probably already have enough scrapbook paper laying around to make this tonight without buying a thing!!  I love, love, love projects like this!!
I think I'd like to make these for my dining room chairs.
Hmmmmm . . . so many ideas, so little time!


We had lots and lots of fun Valentine's ideas linked last week, so I hope y'all took a few minutes to check our some of the SWEET projects by our fellow bloggers while you were linking up your own!
In case you missed them, here are a couple of my favorites!

Valentine's Throw Pillows from Marissa @ Rae Gun Ramblings

I LOVE the look of these throw pillows and the step by step instructions make them something anyone can do!  Yay!

Breakfast has become our Valentine's tradition (after all I love those little monsters as much as Speed!!), so this yummy Chocolate Waffle recipe from Jane @ Adventures in Dinner really caught my eye!  Can't wait to try it on Tuesday!

So, we did say that once again this was a Blog Hop AND Giveaway and this week's prize comes from yours truly!!

Sweet Tooth Pillow


This sweet little tooth is perfect for the little loved ones in your life!!  And the Tooth Fairy will thank you!!  Sooo, much easier to grab the goods from the door than digging under pillow at midnight (or worse yet, 5:30 AM when she remembers there's a tooth waiting from the night before - ACK!!).


With an optional monogram on the back pocket, in either boy or girl colors, and a coordinating ribbon hanger, this sweet tooth will be something your special little someone (AND their tooth fairy) will enjoy for years!


So, for this weeks Blog Hop, here's what we'd like:

1.  Only link your original projects or recipes.
Please no giveaways, etsy shops, business or linky promotions, etc.
2.  Remember to link directly to your post, rather than to your whole blog.
3.  Please do us the kindness of linking back to one or more of us on your blog so others can come and party with us!  After all, the more the merrier!
3.  Please take a moment during the week to look around on the blog hop
and 'like' something (other than your own project - ha!)
4.  You can EARN 'likes' for yourself by following the hostesses' blogs
OR
leaving a comment on our blogs if you are already a follower.
5.  You can EARN additional 'likes' by following our facebook pages
AND leaving a comment!  We LOVE, LOVE, LOVE comments!  Don't you?!
You can follow ME, Randee and Leanne here!

The party girl (or guy) with the most 'likes' by midnight on Thursday night will be winner! 
And we can talk about names, colors - all that fun stuff then!!

Good Luck and Happy Hoppin'!!

Saturday, February 11, 2012

Sealed With A Kiss!

Yesterday was Sheep's Valentine's Party at school and I mentioned before that I was making chair covers for her classroom - again!!  I decided to go with hearts and envelopes that slip over the chair back, initially thinking that figuring out how to do the hearts was going to be my challenge - but the envelopes took a leetle more 'ciphering than I expected, so rather than just posting a couple of pics like I promised,  so thought I would save you the work and post a tutorial instead!

Once I had it pieced together like I wanted, they went together very easily!  Good thing too, because I had MY heart set on embroidering the heart chair covers (grab the tutorial here), even though I knew the only one who would know the difference would be me!  I can't help it!!  Once I have a project in my mind a certain way - I've just got to find a way to do it or I will NOT be happy!!!  Speed called me crazy, but I'm sure the word he was looking for was creative!!!  Or maybe talented?!  Anyhoo. . .

Envelope Chair Back Tutorial

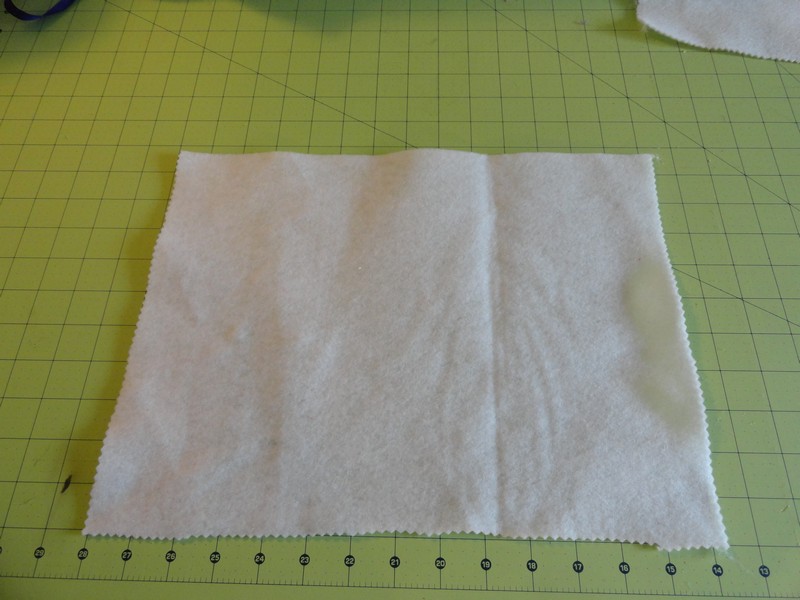
Step 1:  Figure out the length and width of your chair back and cut a single piece of felt those dimensions.


Step 2:  Cut another piece of felt using the first piece and measuring up half the length +1" from the center.  Use a straight edge to connect the center point back to the top edges of your rectangle, forming the back and flap of the envelope.


Step 3:  Pin the flap of the back to the front of the front rectangle and sew along the flap and across the bottom in your contrasting thread.  I chose red :o)


Step 4:  Cut a small heart out of a contrasting felt (Red here again for moi!) and pin over the point of the flap.  Stitch around the heart to secure it to the envelope.


Step 5:  Fold your opened envelope in half and pin along the sides - like sew!


Step 6:  Stitch the two sides together, working from the bottom to the top and pulling back the envelope edge to conceal your stitch end.  (Ignore the Perler Bead disaster you see behind my machine - that's a whole other story.  I WILL figure out who gave those to Sheep for her birthday and thank them - ha!)


Step 7:  Ta-Da!  or should I say Ta-Done!!  Sew simple!!  Sew quick!!  If your child's party isn't until Tuesday - you've got plenty of time!  Or try them on your own chairs - they won't cover the back completely, but they will still look sweet!


Don't these look sweet in the classroom?!  The kids LOVED them!!

HAD to add the embroidery - just had to!!!!


Tuesday, February 7, 2012

Kiss Me!

This is a project I have been completing (in my head!!) since before Christmas.  I saw something similar at a neighbors house over her kitchen door and immediately thought it would make a great alternative to mistletoe!!  Buuuut, Christmas came and went (sniff) and no letters were made.  Still,  who doesn't want a surprise smooch any ol' time of year, and especially at Valentine's!  And with the constant hustle and bustle in and out of our mess kitchen, what a great reminder to STOP and appreciate what it's all about in the first place!

Between craft store sales and coupons, this project came together for about 10 bucks and it can easily be completed during nap time.  So let's get started!!


Supplies:
Large chipboard letters (Mine came from Hobby Lobby, but you can find them in lots of crafty places these days.)
Staple gun with small or medium staples
Hot glue
Red paint
1 can of Glitter Blast spray paint in Cherry Bomb (I love that name!)

Step 1:
Determine the configuration for your letters and staple/glue as needed.  I needed to  use staples to get the K and I to come together without using a strip of wood or molding below/behind.  I decided to stack the S's for the same reason.  And, I think they look cuter that way anyhoo :o)


Step 2:
Paint a base coat of red paint.  I had some leftover spray paint from our art party but you could use regular acrylic paint as well.  I just wanted to make sure none of the cardboard showed through the glitter paint.


Step 3:  Glitter Blast!!  'Nuf said!


Voila my sweet friends!  Or should I say, "Mmmwah!"


Monday, February 6, 2012

Start Your Own Conversation!


There seems to be two types of people in this world: Those that like conversation hearts and those that don't! I am firmly in the DON'T camp. Not that I didn't like getting them in school for Valentine's Day - I just didn't like eating them!! They're gross!! But who wants to miss out on all the fun that comes with them? Certainly not me!

So I decided to take my aunt's recipe for butter mints (yum) and try making my own instead! And they are so stinkin' cute!! And the taste, well - just see for yourself!

Butter Mints are light and fluffy and so easy to make, even a girl scout daisy troop can do them - ha!  With only three ingredients and NO cooking or candy thermometers required - they are my kind of candy!!  Best of all, these mints (or just the dough) freezes beautifully, so you can make a BIG batch and then have fresh mints when you need them - perfect!

Big Andy's Butter Mints
1 stick butter, softened
2 Cups powdered sugar
1 tsp. peppermint extract (you can do more or less to taste)
several drops of food coloring
Small bowl of granulated sugar

Mix butter, extract and powdered sugar together.  I just use the tools God gave me for this but you could try your stand mixer.  The 'dough' will come together and be somewhat elastic.  Separate into several balls and add food coloring as you wish!  Add more powdered sugar if it gets sticky - this isn't rocket science so you don't have to be precise :o)

Choose your candy mold (I chose hearts for obvious reasons!)


Pinch a small piece of dough and form into a ball.  Roll in granulated sugar and then press into mold.  If you skip this step, your candy will stick inside the mold so don't forget!

Turn mold over and tap lightly to release candy.  Embellish using food markers for the wording.


Store in an airtight container in the freezer until ready to use, adding wax paper between layers of candy to prevent them from freezing together.  They will keep for months, but once you taste them, I guarantee they won't last that long!!!


Happy Valentine's Day Y'all!

Sunday, February 5, 2012

Sassy Sunday Blog Hop and Valentine's Giveaway

WOOO HOOOO....the moment has arrived!! This is the 1st Sleepy Sunday SASSY Sunday Blog Hop that we will be also having a GIVEAWAY!!! 

This party is being co-hostessed by
(or should I say Twinkied?!  Yes,  me thinks I like the sound of THAT!)
Randee from
and Leanne from

This weeks giveaway is made by Twinkie RANDEE and I hope that yall get as excited as I am about it!!

Valentine Balloons


Can you say "Fabulous?!?!"
Randee will send you the balloons for you to fill with candy and then blow up and will make you 8 Valentine Cards with your child's picture and toothpick! You will have to email her your pic!!

Here is how we are going to do it!! We will enable the "LIKE" feature on Linky Tools and whoever has the most "LIKES" Thursday night at midnight will win! PLEASE only like a project once so we can keep this giveaway FAIR! Now we will be adding "LIKES" for the following things:

1. Link up a project

2. Follow Randee's Organized Chaos, Because I think I Can and Don't Mess With My Tutus . If you already follow them through Goggle Friends then sign up for emails...leave a comment telling me! You will get a "LIKE" for each one but need SEPARATE comments!

3. "LIKE" Randee's Organized Chaos FB page...leave a comment telling her!

4. "LIKE" Because I Think I Can FB page and leave a comment! 

5.  "LIKE" Sassy Pants Studio FB page and leave a comment!

I hope that everyone has fun and PLEASE tell all of your blog friends to come PARTY with us!!

Thursday, February 2, 2012

A Little Pick-Me-Up

Some weeks it just seems like there's too much to do, not enough time to do it, and TOO many children people pulling me in too many directions!  This morning we (and by WE I mean Snacks) threw all the toothbrushes in the upstairs bathroom in toilet, came down stairs drinknig a cup of water from the toilet, used the stool in the kitchen to reach the bananas in the fruit bowl, pulled out all the bibs brom the drawer and replaced them with the bananas and somehow disassembled the bubble blower mower in the kitchen (it's usually outside) spilling bubbles all over the floor - all before breakfast!  (Deep breaths)  It's enough to make a girl want to just stay in bed . . . or go back to work!! 

Thank heavens for my local radio station KSBJ, that allows me to tune in to the Lord and tune OUT all the headaches of the SAHM.  I don't know about you, but I can really hear the voice of God in music and this morning He said to me (once again), "I know what you're going through.  Hang in there!"  It never fails to pick me up!

Listen!  You might hear Him speaking to you too!

Monday, January 30, 2012

I Heart Chair Covers!


I first came up with the idea for chair covers back at Halloween, when I was probably overwhelmed with laundry or trying to find a moment alone spend quality time with my children and didn't bother to check my e-mail for a couple of days, thereby missing the e-mail about the class party.  For those of you with school age children, you know what I am talking about!  Being the last to acknowledge the group e-mail about the upcoming class party can be disastrous!!  Invariably all the good (easy) items to bring have already been taken and your stuck coming up with a brilliant game idea that 22 kids can play in 10 minutes that doesn't cost a whole bunch (because you're donating it) AND won't be too messy, too sugary or somehow politically incorrect - uugh!   I could have simply ignored the e-mail altogether, but then I might be labelled as a slacker mom and how would this impact Sheep's future education/reputation/opportunity here in small town USA?!?!?!

Let's face it, the stakes are high! 

Needless to say,  I was dismayed  to discover that the only item not taken was decorations.  And have you looked in your child's classroom lately?  It is generally so cluttered with posters, projects and other paraphernalia that it's hard to imagine what kind of 'decorations' would even be noticed!

Once again, Pinterest to the rescue!!

I saw these cute little ghost chair covers from Family Fun and the wheels started turning!  I got so excited about the whole thing, I rushed right up to school, snagged a chair and got to work!  And the square shape of the classroom chair lends itself to all kinds of  fun holiday shapes that aren't possible on a full-sized chair!!!  They were SO STINKIN' CUTE and Sheeps' classmates loved them so much that I knew I'd be doing these again for the other holidays as well!

Like the Halloween chair covers, these sweet little numbers don't cost much $$$ either, because they are made with felt!  So let's get started!

Supplies:
Felt
Pinking shears
Sewing machine or hot glue
Ribbon

Step 1:  Measure your chair.  You will need three measurements:  Width across the back (A), The length from the top of the back to the bottom of the back (B) and the length of the back support (C).


Step 2:  Make your template.  I made mine out of felt. transferring my measurements and drawing a rectangle so you know how wide your heart will need to be.  Once you have your rectangle, you can freehand your heart, leaving a little for seam allowance, though you don't need to leave much because felt doesn't ravel - yay!!


Step 2.5:  Once you have your template, you can use your mad math skills to calculate how many hearts you are making and how much felt you will need!

Step 3:  Cut out your heart on felt that has been doubled so that you have a front and a back.  I used my pinking shears to add some additional visual interest but you don't have to, it's up to you!  Though I must say, the pinked felt looks SO CUTE!

Step 4:  If you want to add any embellishments, now's the time to do it!  Especially if you plan on sewing the chair cover together rather than hot gluing.  I cut a simple XOXO design out of white felt and stitched it on.  You could glue here as well, but I thought stitching might be more durable and once you've made 22 of these, you aren't going to want to be doing this again every year.  Make them to last and you can reuse them yourself (if elementary school is in your future for the next 6 years like it is mine) or give them to your child's teacher - what a great teacher gift!!


Step 5:  Sew (or glue) your hearts together, leaving plenty of room at the sides to get it over the chair back.  You can sew one side down further than the other to keep it as snug as possible, but don't go too far - it's no fun to rip on felt!!


Step 6:  You can simply cut a slit at the bottom to use as a button hole to clasp the two hearts together at the bottom, or you can actually make a button hole like I did - your choice!  With this shape, I think the button hole is important, because kids are wiggly, squirmy and just generally don't sit still - and you don't want them slipping off and becoming a distraction rather than a decoration!


Step 7:  Tack about 18 inches of ribbon to the inside back of your chair cover so that it can be threaded through the button hole and tied in a bow!  A button would look cute too, but I liked the ribbon!


Step 8:  Deliver to your child's classroom and prepare for lots of ooo's and ahhh's!  Mine will hopefully be arriving February 1st so they have two weeks to enjoy them!!

I am also going to do some shaped like envelopes, so I'll be sure to post a pic or two of those as well!  Happy Valentine's Yall!

UndertheTableandDreaming
br />


michellepaige

Adventuresindinner