Pages

Showing posts with label kids craft. Show all posts

Monday, December 2, 2013

Sock Snowmen . . . and women!


Seems like FOR-EVAH since I've had a free minute for the computer - November totally got away from me somehow, but not because I haven't been getting my craft on!  On the contrary, I stepped in to coordinate a craft booth for Sheep's newest activity . . . 4-H!

The Bay Area 4-H is a newly chartered (Read broke.  Very, very broke!) chapter with three exciting "projects" for area youth:  dog training, sewing and robotics.  I wanted sewing of course, but Sheep chose dog training, so dog training it is for now.  I guess she figures mama sews so she doesn't need to learn - ha!

Our dog training coordinator knows an awful lot about dogs, but didn't know diddly about prepping or participating in a craft show, and since this was supposed to be our big fundraiser . . . well, I am sure you know what happened next!

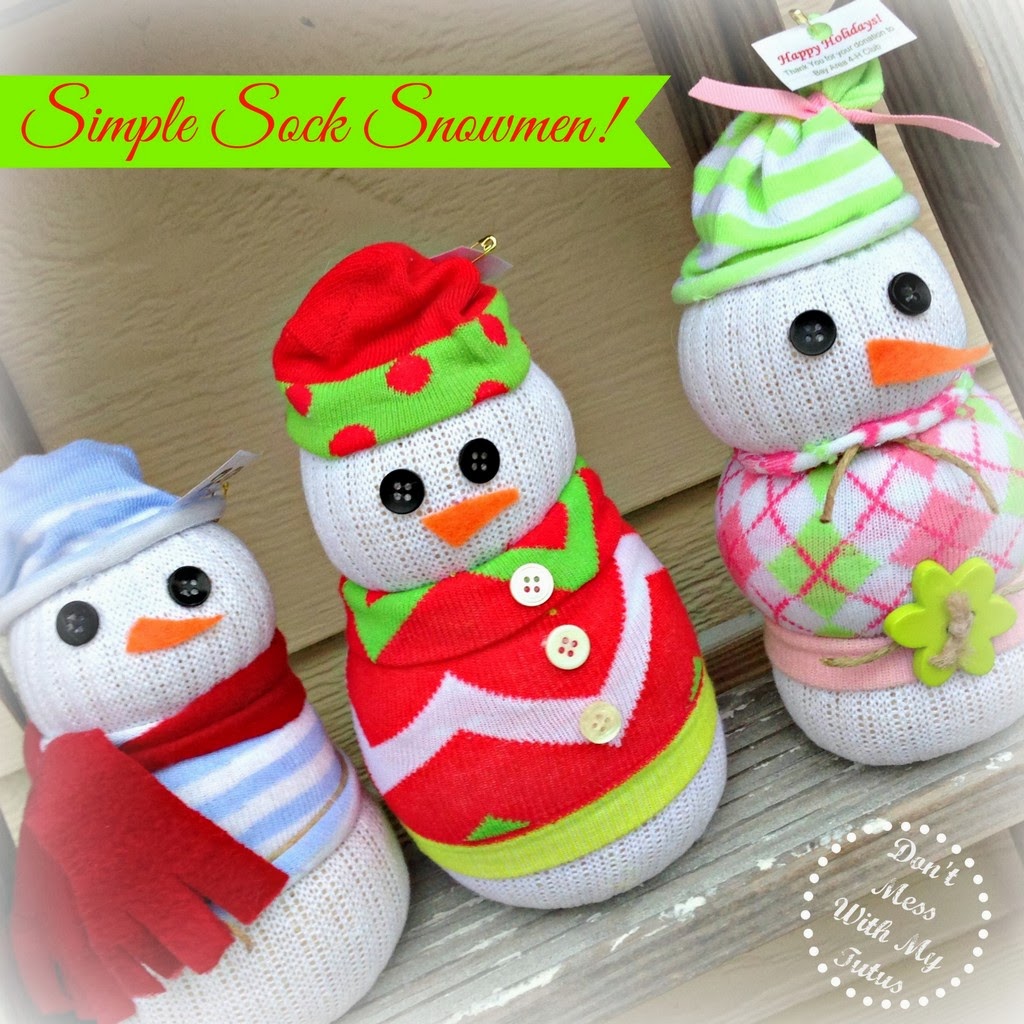
And thank heavens for Pinterest!  As usual, I was able to find some easy and awesome projects for our sewers and non-sewers alike!  These super sweet sock snowmen were just one of them!


These were showcased by Amy over at Then She Made . . . and you can get all the particulars on how-to by heading here.  Aren't hers sweet?
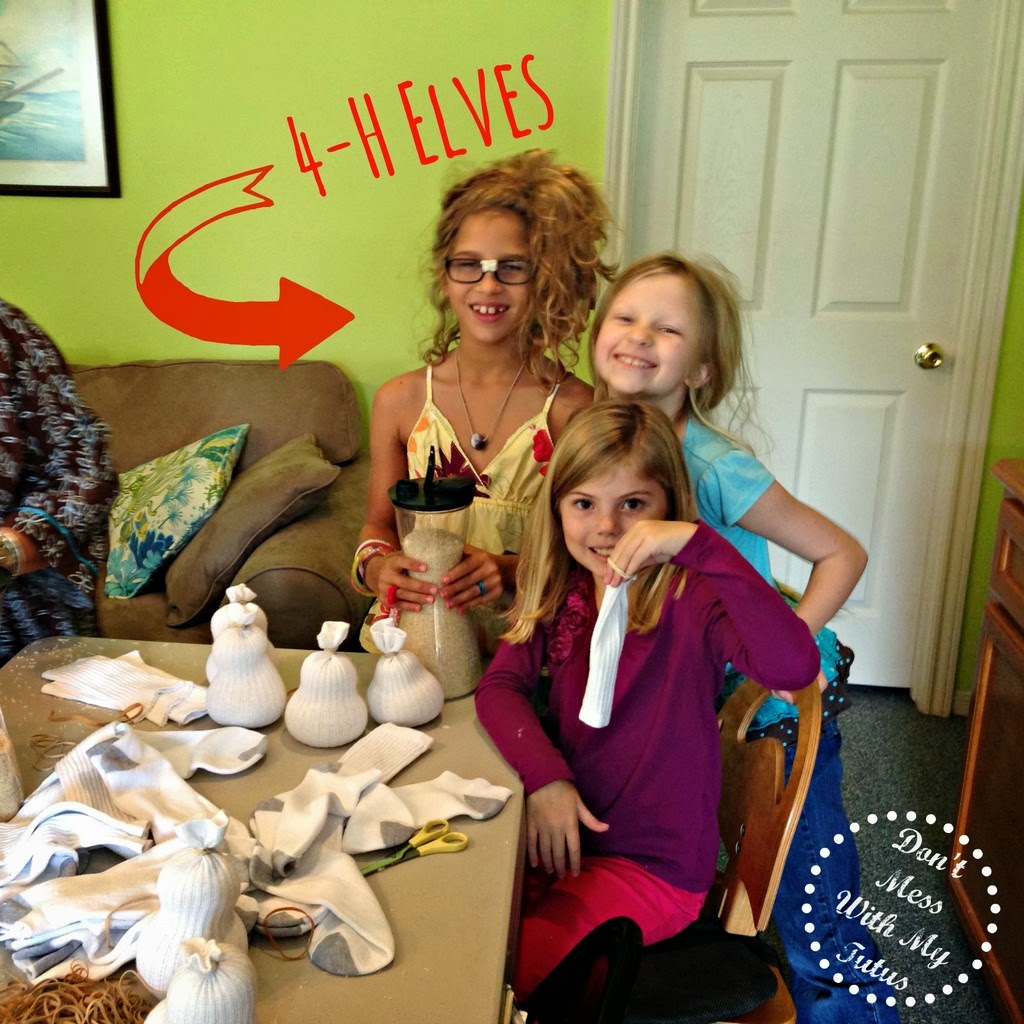


So we gathered our little elves at another mom's house to get crafty for a day.  It was a looong, busy day, but everyone had fun and when we left on Saturday night, we had an army of little snowmen to spiff up and sell the show - the following Saturday.  ACK!!


Luckily, the little 4-H elves had some fairy godmothers (in the form of my friend and my MIL) who were able step in and help finish the job!
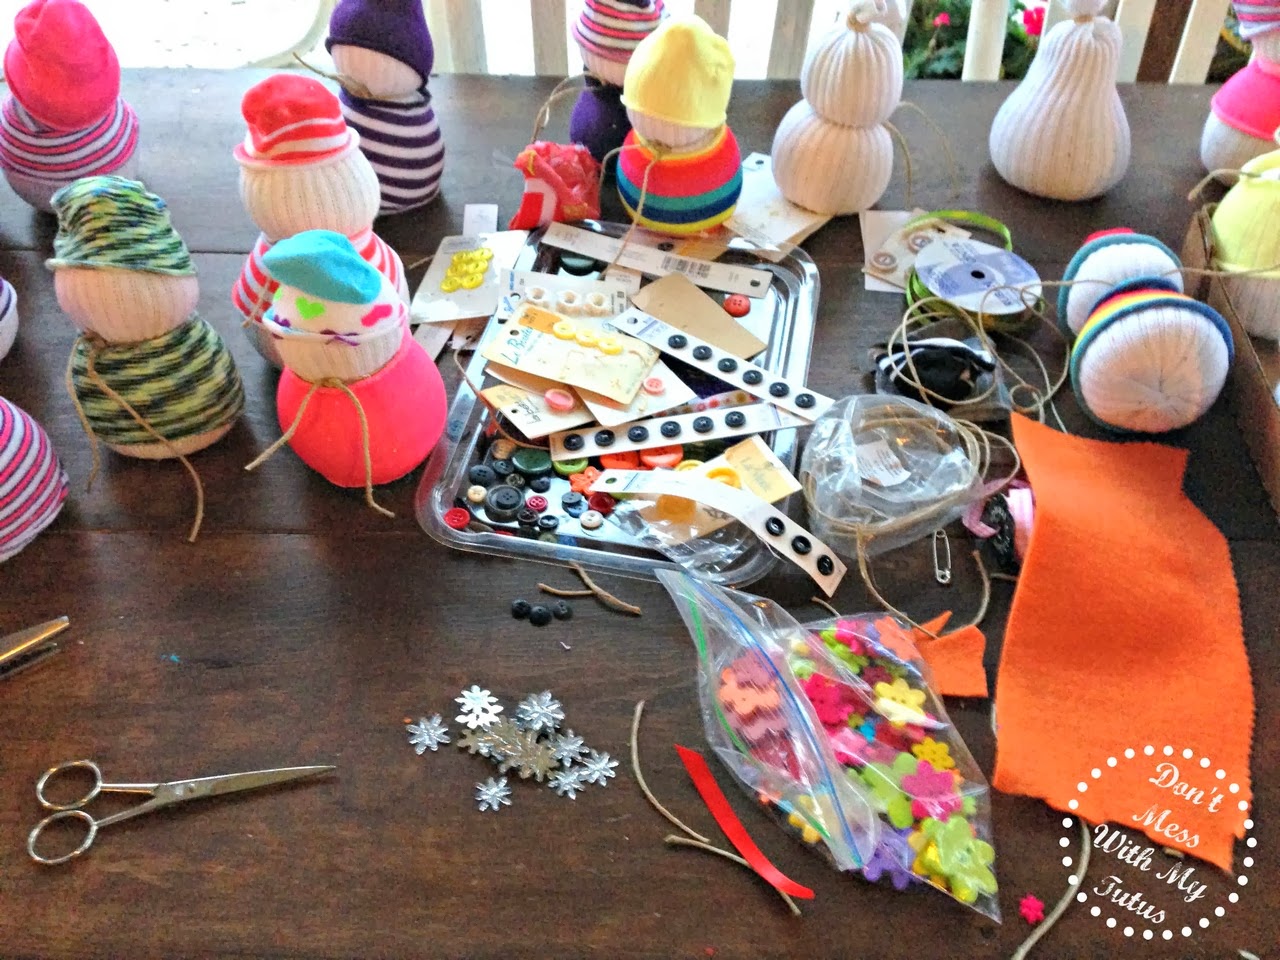

And here's what we learned along the way:
  1. Big Lots has cheap socks that are perfect for this project!
  2. It takes more rice than you might think to fill up the socks so that your snowmen bodies are taut!
  3. Tiny black buttons (like the ones on the pinspiration snowmen) are hard to find.  If you look closely, you can see that our eyes ended up being somewhat bigger - but still adorable!
  4. It helps everything stay in place better if you tie your twine over the sock at the neck and adding a second piece of twine at the waist really secures everything well.  After all ,people want to pick these cuties up and squish 'em, which can make all their clothes get rumpled and that's no good!
  5. Orange felt was an easy substitute for the toothpick noses in the pinspiration piece and it looks quite dashing if you ask me!
  6. By the time you've made and dressed a snowman, it has taken on a personality of its own, which made them very hard to part with so be prepared!
  7. These little guys make great paperweights, bookends, desktop friends and teacher gifts.  We even added a place card with some tape to one and used them on a holiday table.  You could just as easily attach a gift card for a super-special someone!
  8. This was a great fundraiser craft.  Although decking out all the snowmen took lots of time, it was fun, and cost us less than $1 each, so our profit margin was significant!

So, if you're looking for an economical  Christmas gift idea, an easy craft for your kids over the holidays or a simple fundraiser - these sock snowmen fit the bill.  And you know what they say . . . If the sock fits, make snowmen! (Or something like that!)

Stay tuned for more Christmas craft ideas you still have plenty of time to make and enjoy this season!

Sharing this sassy project at some or all of these great parties: Under the Table and Dreaming, Totally Overflowing with Creativity, Three Mango Seeds, Classy Cutter, Serenity You, House of Hepworth, Skip to my Lou, LadyBug Blessings, Nap Time Creations, The Style Sisters, Polkadots on Pararde, Rae Gun Ramblings,Costal Charm, Not Just a Housewife, Domestically Speaking, The Shabby Creek Cottage, Sumos Sweet Stuff, The Gunny Sack, Gingersnap Crafts, Southern Lovely, Lil Luna, Someday Crafts, The NY Melrose Family, The DIY Dreamer, The Blackberry Vine, Homeworks, The Rustic Pig, Cornerstone Confessions, Kathe with an E, House on the Way, PJH Desgin, Glued to my Crafts, The Crafty Blog Stalker, Seven Alive, Made in a Day, Live Laugh and Love, A Creative Place, Have a Daily Cup of Mrs. Olson, Home and Gardens, It Happens In a Blink, I Gotta Create, Domestic Super Hero, All Pretty Things, Katie's Nesting Spot, 52 Mantels, Truly Lovely, Twinkle in the Eye, Happy Hour Projects, Six Sisters Stuff, Tutus and Tea Parties, Mop It Up Monday, Saturday Show and Tell, Moonlight and Mason Jars, The Scoop, Wow Us Wednesdays, Take-A-Look Tuesday

Monday, October 28, 2013

Itty Bitty Baby Hat Tutorial


I was all set to fill you in on my class goody bag idea today, but over the weekend my Girl Scouts and some of their moms spent time working on our service project, and it was just too special not to share!

Last Spring, my co-leader and I asked the girls to brainstorm ideas for a service project that we could do with a portion of the money we raised for our troop through cookie sales.  We told them to look around our community, talk to their parents and teachers and come back with some suggestions.  They originally settled on fleece blankets for residents at one of the local nursing homes, but after surveying the price of fleece, we knew our money wouldn't make very many adult-sized blankets, so we thought about blankets for babies in the hospital instead.


We are very blessed to live in an area where the vast majority of babies in our local community are born into families who can more than adequately provide for their little ones, so the NICU staff felt that although the blankets would be appreciated by the families, they weren't really needed.

And that got me thinking back to a very special set of parents and babies I used to work with before having my second child - families who have experienced a fetal or early infant loss.  For five years, I worked side-by-side with these families, helping coordinate the largest clinical research trial in the country (and perhaps the world) investigating the causes of stillbirth.  As a clinical research coordinator for the Stillbirth Collaborative Research Network, I had a chance to work with so many amazing couples and families who were unbelievably courageous in the face of such terrible and unexpected loss.  I knew these families were much more likely to need the blankets and hats my girls could make.


In our local hospital, like most hospitals, the memory boxes, blankets and other mementos given to the parents after a stillbirth or early infant loss are provided solely through donations.  Frequently these donations come straight from the nursing staff who care for these families during and after loss, so I knew that whatever we could help with be appreciated by the staff as well as the families.

It was challenging to discuss such a sad reality with my girl scouts, but I found that the girls and their parents had such open minds and loving hearts for these families.  After talking with them I also learned that one of our scouts had a twin that did not survive.  Several of our other girls already knew something about the NICU and special care nurseries because they or their siblings had been patients there themselves and had heard the stories of their births from their families.  It was awesome to witness their understanding and simple acceptance of something I thought might be a very foreign and possibly frightening matter.

And I am proud to say that my troop of 3rd graders already has such a heart for service!  By the end of our discussion, the girls had decided that they wanted to make blankets AND hats AND memory boxes for these babies and their families, so I set about figuring out a way to make that happen.
This 'Itty Bitty Baby Hat Tutorial' is the result!

Supplies:
Patterned knit fabric
Fabric glue
Scissors

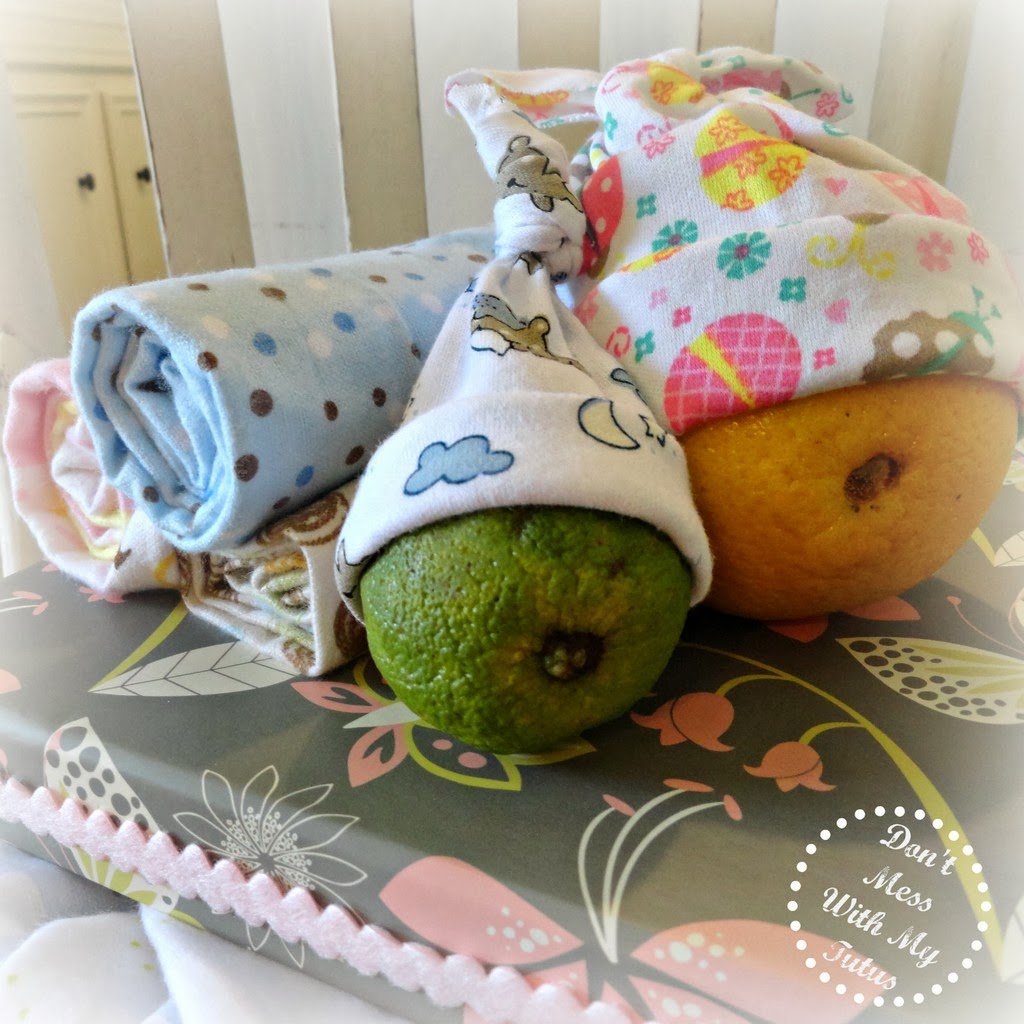
We chose knit fabric for its stretchiness and the fact that it doesn't ravel, so it wouldn't need to be sewn or have the edges finished in any way.  And after confirming with the Perinatal Bereavement Coordinator at our local hospital that the majority of their fetal and infant losses occur before 26 weeks in pregnancy, we decided on sizes for our hats, using small oranges and limes as guides.


  1. Cut a width of fabric approximately 11" long.  Our fabric was 45" wide, so we simply cut our fabric widths into thirds (15") for our larger hats.  Our smaller hats were about 7" wide and we cut the length into quarters (about 11" long).
  2. Fold your swatch of fabric in half with right sides together the long way, to keep the length at 15".  Turn back the top side slightly and run a thin bead of fabric glue along the edge.  Fold top side back, gluing right sides together and forming a tube with the fabric.  Allow to dry 2-3 hours or overnight.
  3. Once the glue has dried, fold your tube of fabric in half long way again, bringing the folded edge of the fabric to the inside edge of the glued seam.  it will be slightly offset.
  4. Cut a triangle of fabric from the top edge of the folded tube to form a point.  We started our cuts about 3-4" down on the length, but you may have to play with your fabric to figure out how much you need to take out to make a clean knot.  Some of our fabrics were stretchier than others, so we adjusted as went went along.
  5. Turn your cut fabric tube right side out.  Now you have two options for forming the top knot of the hat.  You can either open up your tube, bringing the seamed edge to the folded edge to form two points on the sides or you can simply unfold so that the point is in the middle, with the seamed edge on one side and the folded edge is on the other.
  6. If your are tying the two points together, bring them to the center and tie in a knot.  This forms tiny 'ears' at the end of the knot.  The bunny ears seemed to be easier for some of my girls to tie and the stretchiness of the fabric seemed to make a difference as well.  Bunny ears worked better on the less stretchy knits.  Use a simple, single knot on itself if you leave the points together.
  7. Adjust your knot so that it leaves as much fabric as possible below the knot.  This will make the hats more adjustable and able to fit a larger range of babies.
  8. Fold about 3" of fabric back under to the inside of the hat.
  9. Turn up a cuff on the outside.  Your cuff now should have the right side of the fabric showing.
  10. Make as many as you can and present them to your local community hospital too!
We made about 36 of the 'large' hats and 23 of the 'small' hats using about 3 yards of fabric. We made these 'itty bitty baby hats' for the tiniest of babies, but you could certainly add some length and width and use the tutorial to make simple hats and receiving blankets for full-term babies as well.  The fabric glue says its washable after 48 hours, but if I were making these as a shower gift, I would probably sew my seam instead.  Otherwise, the rest can be done the same way!


The girls also cut 18" square blankets from flannel (again because it doesn't ravel) and glued ribbon around the lids of 13 photo storage boxes to be used as memory boxes for these families.  The nurses typically bath and 'dress' the baby in a hat and blanket before presenting them to the parents, and these items will be placed in the memory box as a keepsake, along with pictures, footprints and other things, when the family leaves the hospital.

We will be putting everything together and plan on presenting it to the labor and delivery staff next month.  This has been a fun and rewarding service project already and I know it will mean even more to the girls when they present their handiwork to the hospital.  I am humbled by their compassion for families that hold a special place in my heart as well and honored to work with such a great group of girl scouts!

If you are interested in understanding more about stillbirth and infant loss and what you can do to help, visit First Candle, Now I Lay Me Down to Sleep and National Share.

Sharing this special project at some or all of these great parties: Under the Table and Dreaming, Totally Overflowing with Creativity, Three Mango Seeds, Classy Cutter, Serenity You, House of Hepworth, Skip to my Lou, LadyBug Blessings, Nap Time Creations, The Style Sisters, Polkadots on Pararde, Rae Gun Ramblings,Costal Charm, Not Just a Housewife, Domestically Speaking, The Shabby Creek Cottage, Sumos Sweet Stuff, The Gunny Sack, Gingersnap Crafts, Southern Lovely, Lil Luna, Someday Crafts, The NY Melrose Family, The DIY Dreamer, The Blackberry Vine, Homeworks, The Rustic Pig, Cornerstone Confessions, Kathe with an E, House on the Way, PJH Desgin, Glued to my Crafts, The Crafty Blog Stalker, Seven Alive, Made in a Day, Live Laugh and Love, A Creative Place, Have a Daily Cup of Mrs. Olson, Home and Gardens, It Happens In a Blink, I Gotta Create, Domestic Super Hero, All Pretty Things, Katie's Nesting Spot, 52 Mantels, Truly Lovely, Twinkle in the Eye, Happy Hour Projects, Six Sisters Stuff, Tutus and Tea Parties, Mop It Up Monday, Saturday Show and Tell, Moonlight and Mason Jars, The Scoop, Wow Us Wednesdays, Take-A-Look Tuesday

Wednesday, March 27, 2013

Toilet Paper Roll to Easter Treat Tutorial

 
Easter is just around the corner, but you've still got time to whip up some of these adorable treat boxes for classroom parties and baskets of course!  And they're so easy - even a rabbit can make them - ha!
 
Supplies
Toilet paper rolls
Orange acrylic or tempera paint
Clear nail polish or Mod Podge spray gloss
Green tissue paper
Glue
Staples
CANDY!
 
I had actually seen these made up as candy corn treat boxes last year at Halloween, but never had time to make them in the Fall.  And then I got to thinking, why not use that same shape to make carrots and Easter Bunnies instead?
 
 
I never actually got farther than painting the roll white for the bunny, but you can figure it out from the instructions below and I think they would be adorable as well!  Simply start by painting your rolls with tempera or acrylic paint.  I had tempera paint on hand, so that's what I used.
 
 
I would have stopped here, but the paint I had dried very dull and I wanted them to be shiny.  You could certainly spend a little and get glossy finish paint or try spray paint, but I decided to try clear nail polish instead.  Again, it was what I had on hand and since I'm usually crafting while supervising homework and starting dinner, I'm frequently left to 'make do'.  Hey, it was smelly, but it worked!
 
 
However, if you're going to be making lots of these, I would go ahead and grab the Mod Podge glossy finish spray - much faster and less smelly!  Once it's dry, you're ready to glue down one end.  I had Elmer's on hand, so i held it together with a clip for a minute or two before moving on to the next one, but tape runner or hot glue would make quick work of this if you're making in bulk for baskets or classrooms.
 
 
Now you're ready to fill 'em up!
 
 
Then grab your green tissue paper and make your carrot tops!  I made mine two different ways and liked them both.  On some I cut several squares out and fringed the ends.  On others, I pinched the squares in the middle the same way you would to stuff a gift bag.
 
 
Now the trick to making the carrot shape is to seal the roll on top by pinching it closed in the opposite direction from the bottom.  This gives you the triangle shape you need for the carrots and reminds me of the little cream packets they used to have at restaurants when I was a kid too - yum!  Since I'm not planning on these being reusable, I simply inserted my tissue paper tops and stapled closed.  The tissue paper seems to hide the staples just fine and they're easy to open as well!
 
 
We'll be passing these out tomorrow at the class party!  Aren't they cute?!


Happy Easter Y'all!


Tuesday, February 12, 2013

Edible Photo Props for Boys!

 
Let's face it, Valentine's just doesn't get any sweeter than this!
 
Sheep and I came up with this darling edible photo prop idea while making lip-shaped cookies for her classroom, and knew we would need something for the boys as well.  Our lips were made with a delicious strawberry cookie recipe and what goes better with strawberries than chocolate?!
 
After some serious search time, I settled on a chocolate cutout cookie recipe from King Arthur Flour, but put my own spin on it because (as usual) time was of the essence and I didn't have all the ingredients it called for on hand.  You can check out the original version here and here's the version I used as well.  They are delicious I might add!
 
Chocolate Moustache Cutout Cookies
 
  • 1 cup sugar
  • 1 cup unsalted butter, room temperature
  • 1 teaspoon baking powder
  • 1 teaspoon vanilla extract
  • 3/4 teaspoon salt
  • 1 large egg
  • 1/4 cup Hershey's Special Dark Cocoa
  • 1/4 cup cocoa
  • 2 1/4 cups flour

  • Mix dry ingredients together in seperate bowl.  Cream butter and sugar.  Add egg and vanilla.  Add dry ingredients.  Chill dough.  Roll to 1/4-1/2" thickness for moustache cutouts.  Insert stick before baking.  Makes about 18 4" cookies.  Bake ay 375 degrees for 8 minutes.  Cool on pan for several minutes before removing to wire rack to cool completely.

    Since this idea was hatched, I have been on the hunt for a moustache cookie cutter locally (again, no time), but my clever sister suggested that I just cut out the lips and use the bottom to take off a small piece to form a moustache instead.  What can I say, it runs in the family!!


    Anyway, that's what I did!

     
    Voila!
     
     
    Trying to get a picture of the finished product proved a bit tricky, as my model was more interested in licking, kissing and nibbling the props!


    Oui, oui my little 'nekked' chef!  I supposed this would be your favorite holiday!
    Let's just say, it's a good thing I made extra!
    And I ended up with one that I could work with . . .
     
     
    and turn into the cutest card EVER too!
     
     
    Happy Valentine's Day Y'all!
     
    Sharing this Sassy Idea @ Sunday Showcase, Mop It Up Mondays, Meet Me Monday, Made by You Monday, Debbie Doo's Newbie Party, What's In the Gunny Sack, Take-A-Look Tuesday, Tuesday Tutorial, Wow Us Wednesdays, {Wow Me} Wednesday @ Gingersnap Crafts, Cowgirl Up, Whimsy Wednesdays, Pin It Wednesday, Show and Share, Overflowing with Creativity, Creative Me, Made U Look, It's a Hodgepodge Friday, Saturday Show & Tell, Weekend Showoff Party, Pin It Party @ Debbie Doo's, Strut Your Stuff Saturday, Tatertots & Jello
     

    Friday, December 7, 2012

    Ready, Set, SWAPS!


    As many of you know, I've got a Brownie in my house and this year our girl scout troop has taken the plunge and started camping!  We started back in October with a Mother-Daughter overnight hosted by our service unit, but last weekend was our first camping trip without moms (Dun, Dun, Duuuuuun)!!

    There was lots and lots to do to get ready and to tell you the truth I was more than a little nervous about taking 7 girls to the woods for the weekend with only one other chaperone, but it was wonderful!!  Thanks in no small part to the Host(ess) troops who came up with the cutest theme for a winter campout ever - CANDYLAND!!

    Hats off to those girls because they put on a spectacular program, filled with crafts, archery, canoing and all the candy you could eat (and then some!!).  Girl Scout camps with a pre-set program of activities are called carousels and I would definitely recommend them as a "next step" in your camping progression, because it means all the troop camper (ME!) and chaperones need to take care of is food and sleeping arrangements!  And for our first time out without back-up, that was enough!

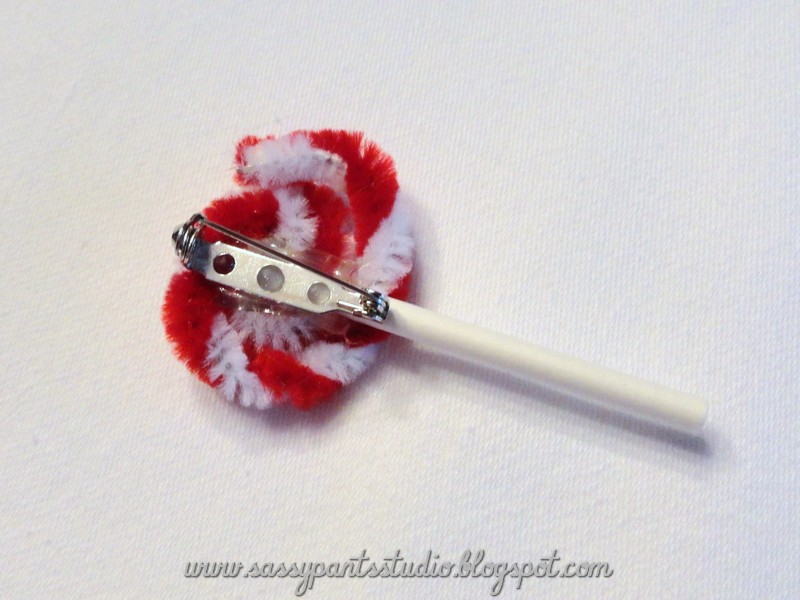
    One of the things we did to get ready for our campout was make SWAPS!  SWAPS are either Special Whatchamacallits Affectionately Pinned Somewhere or Something Shared With A Pal - either way, they are something little to exchange with other girl scouts you meet at camp and elsewhere.  They usually have a pin so they can be worn and/or displayed while you're out and about!

    Pinned Image


    Swaps are fun,  but can also be somewhat of a challenge when you're asking little ones to do the work.  Luckily,  I found this idea on Pinterest and knew it was something my Brownies could tackle!  BTW, I have since checked out SWAPS-A-Lot and they have very affordable SWAP kits available, but of course I was prepping for this project mere hours before the meeting, so no time for something like that.  Besides, I figured we could wing this one!


    Lollipop SWAPS

    Supplies:
    Multi-colored pipe cleaners, cut in half
    Popsicle sticks, cut in half
    Hot glue
    Flat-backed pins

    Instructions:
    1.  Twist two different colors of pipe cleaner together to form a candy cane stripe.
    2.  Start at one end and roll up flatly to form the lollipop.
    3.  Place a dab of hot glue on the back to attach the Popsicle stick.
    4.  Use hot glue to add the flat-backed pins.
    5.  Print out your troop number (and the name of the event if you want) on cardstock.
    6.  Cut out small tags, attach with pin.
    7.  Now Share With A Pal!

    Close up of flat-backed pins we often use for our SWAPS

    Since it was a Christmas Candyland Carousel Camp (how's that for alliteration?!), I also came up with a quick candy cane swap, that I didn't see anywhere beforehand, but I'm sure is out there somewhere already.  In other words, it was my original idea but probably not the original idea.


    And yes, all of these photos are of actual SWAPS made my my actual Brownies, with only a little help with the glue-gun from me!  Soooo, they aren't perfect and they don't all have the right same number of beads on them, but they are pretty darn cute!  And they are equally easy to make!


    Candy Cane SWAPS

    Supplies:
    Red and White pipe cleaners cut into thirds
    5 Red pony beads and 5 White pony beads
    Hot glue
    Flat-backed pins

    Instructions:
    1.  Turn a small hook on one end of the pipe cleaner to prevent beads from slipping off the end.
    2.  Thread red and white pony beads onto the pipe cleaner, alternating colors as you go.
    3.  Hook the top end of the pipe cleaner over last pony bead to prevent beads from falling off.
    4.  Bend beaded pipe cleaner into the shape of a candy cane.
    5.  Attach pin with hot glue.
    6.  Add your tag (see above) and exchange!

    Friday, November 16, 2012

    Footprint Turkey Napkin Rings

    Good morning and Happy Friday everyone!
     
    I have been one busy little elf this week with Christmas t-shirt orders (Yes, it's that time of year again!!  Yippee!!), but I didn't want you (my adoring fans - ha!) to think I had forgotten about you, so I thought I would share this quick Turkey Day craft from last year!  The kiddos will be out all next week, so there's plenty of time to make these - Enjoy!!
     
     
    _______________________________________________________________ 

    Footprint Turkey Napkin Rings

    Supplies:
    Toilet paper rolls, cut in half
    Brown, red and yellow or orange construction paper
    1 small, clean foot
    Googly eyes
    Good ol' Elmer's glue

    You probably have most, if not all, of these items around your house already! So get everything together and do a lil' cipherin' to figure out how many napkin rings you're gonna need. Then add one more because you're going to want to make sure you have one to keep for yourself - those little feet grow fast!!

    If you don't save toilet paper rolls like we do, well then you are MISSING OUT! There are just tons of things you can do with those things and you know you're not remembering to put them in your recycle bin anyway - ha!! Around here, we have much more trouble finding a small CLEAN foot than an empty toilet paper roll. In fact, it seems like there's an empty roll on the holder whenever I sit down. I don't know how it is in your house, but I am apparently the only one who knows how to change the toilet paper . . . but I digress!! If a clean foot's not possible, I recommend chasing down a dirty one with a wipey and proceeding!

    Step 1:
    Trace around your small, clean foot on brown construction paper to create a template for your turkeys (Let's face it, that foot's not gonna stick around to do a dozen, so just trace once and then set Snacks, I mean the foot, free.) Use template to create the number of turkeys you need for dinner.

    Step 2:

    Glue your feet to your toilet paper rolls, using the heel of the foot as the head and the toes as the body of your turkeys. Glue The rolls closer to the toes than the head, especially if you want your turkeys to stand up on your place settings. Let dry.


    Step 3:
    Cut out small diamonds in yellow construction paper and small wavy red shapes for waddles. Embellish your feet. Remember to use the heel of the foot as the head and the toes at the body. They sort of look like feathers now don't they?! Fold diamonds in half to make beaks and glue over or next to your waddles - your call. Add your eyes as well and let it all dry. Sheep is 6 and did a great job with this while I played 'Oh my Gosh, He Has the Scissors/Sharpie/Glue' with Snacks. This game is played in rounds!!!

    Aren't they looking cute?!?!!
     
    Step 4:
    Take your napkins and lay them flat. Fold your napkins into pleasts, back and forth accordian-style. Once it has been pleated, fold in half lengthwise, the same way you used to to make paper fans when you were a kid! Sorry I didn't take a picture of this step, but hopefully you get the idea. Sheep got pretty good at this too, but I'm not sure anyone younger (she's almost 7) would be able to do this part. You also have to decide how much 'imperfection' you're willing to have at your Turkey Day Feast, so I will leave that up to you. I will tell you that sometimes, after she's moved on, I have been known to redo straighten things a bit, but I would NEVER tell her that!!!

    Step 5:
    Stuff that turkey!! In this case, with your pleated napkin, folded side down so that the napkin fans out behind the turkey foot- voila!!


    I was having trouble getting my pleats to stay together at the top, because I did not iron (much less starch) my napkins beforehand, but I would recommend adding that step if you like the look of them standing up. Sheep seemed to think they looked better laying down so - problem solved!!


    Tuesday, November 6, 2012

    'Handy' Thankful Tree

     
    I've seen these projects all over Pinterest this year, but my twist on the Thankful Tree was actually part of our holiday decor last year.  It's very simple to do and it's something everyone in the house can get in on too!
     
     
    I simply taped together two big pieces of package wrap that I had left over upstairs, temporarily taped in on the door to our pantry and drew the shape of a tree that would fit in the space.  Then I cut out my tree and taped it right back up there!
     
     
    My 'handy' twist on this quick craft is that I traced Sheep's handprint onto colored construction paper and cut those out to use for our leaves.  We traced some of Snack's hands too, but his little paws didn't leave much room to write.  We ended up using Sam's feet for another project I will be (re)sharing with you soon!
     
     
    I also added a quick 'Give Thanks' banner across the top using the leftover paper, ribbons and markers.  Sometime simple crafts are the best!  And we enjoyed this project for weeks.  The kids really liked showing it off and asking guests to add to the tree.  In fact, it got so popular that we had to trace a few more leaves before it was all said and done!
     
     
    I hope you have fun with this project, and enjoy your own Handy Thankful tree this year!

    Sharing this sassy idea at Mop it Up Mondays, Meet Me Monday, Debbie Doo's Newbie Party, Take-A-Look Tuesday, Wow Us Wednesdays, Cowgirl Up, Whimsy Wednesdays, Show and Share, Overflowing with Creativity, Creative Me, Made U Look, It's a Hodgepodge Friday