Pages

Showing posts with label photo prop. Show all posts

Thursday, February 27, 2014

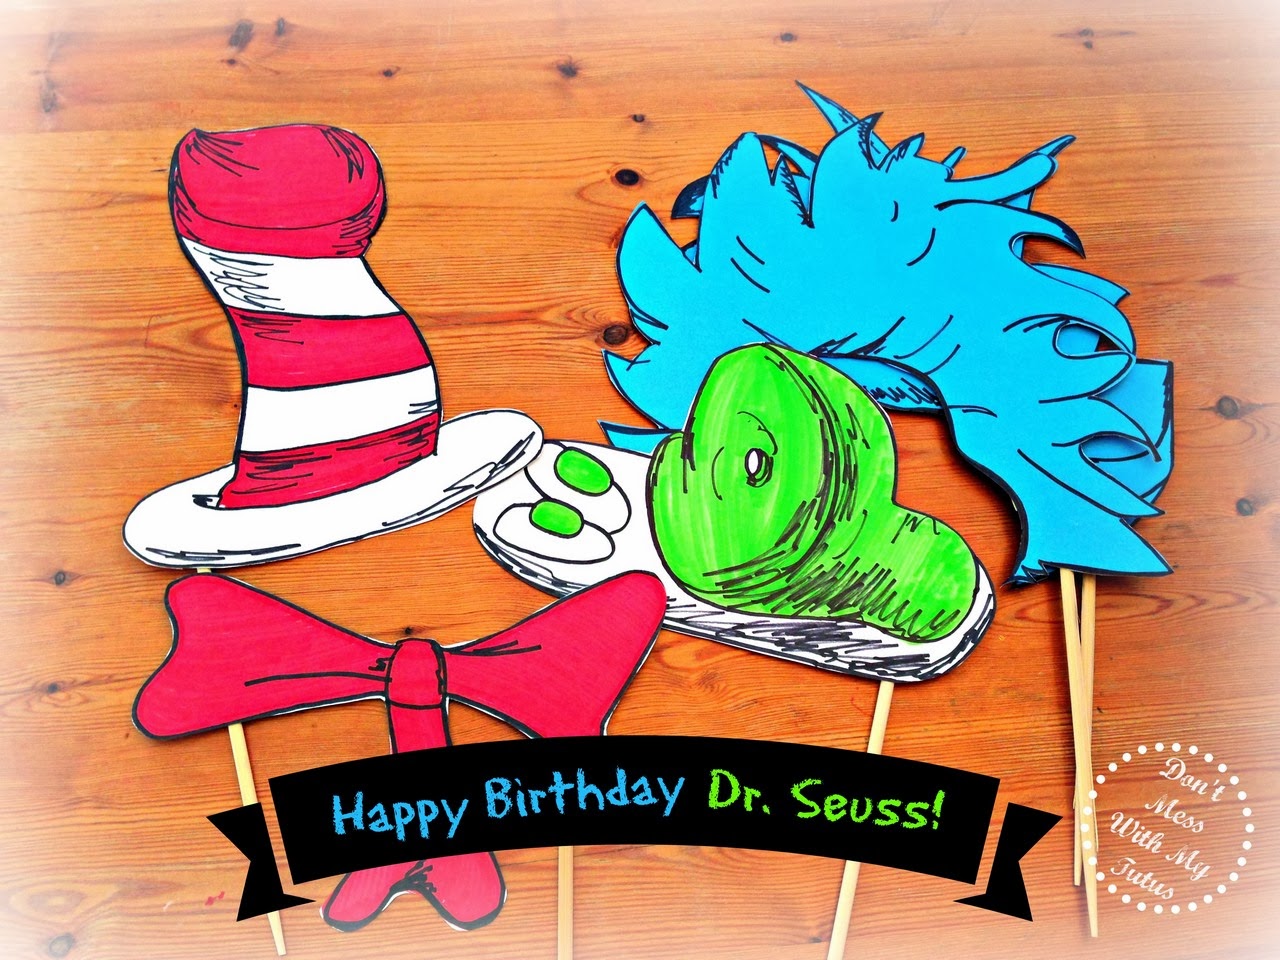
Dr. Seuss Photo Props!


Does your child's class celebrate Dr. Seuss' birthday?

If so, here's a quick and easy craft that's sure to add some fun to this special day!

I made these 'phun' photo props in about 30 minutes using nothing more than some cardstock, sharpies, scissors, glue and chopsticks!  And since you likely have most (if not all) of these supplies around your house, this project was not only quick and easy, it was also FREE!

I like that!

There are certainly lots of creative, crafty sellers on Etsy with downloadable photo props, but I decided to make my own, in part because I wanted my hair for Thing 1 and Thing 2 to be larger than a standard sheet of paper (8.5 X 11), and I figured I could freehand some crazy hair as well as the next person.  I also wanted to make some green eggs and ham for my own little Sam I Am (aka Snacks) and I didn't see any of those on Etsy.

I will also say that while these photo props may not be professional, they are what I call 'preschool perfect.'  In other words, they weren't made to last forever, but they are sturdy enough to get through a day of picture taking in pajamas - 'cause that's how we celebrate Dr. Seuss' birthday in these parts!

Hopefully I will have Here are a few pictures of my little guy using the props for you later this afternoon, but for now,  and here are a few tips for making your own 'preschool perfect' photo props!
  1. HAVE FUN!  That's what Dr. Seuss is all about!
  2. Don't stress if they aren't colored or cut perfectly - the kids will love them anyway!  Personally, the bit of white around some of the cutouts just adds to the cartoon-ish nature of the Dr. Seuss props in my opinion!
  3. If you're making something fairly tall or wide, double your cardstock to give it extra stability.  I did this by simply gluing two pieces together before cutting them out.
  4. Chopsticks are FREE and are the perfect length for kid-sized photo props.  We used chopsticks at Sheep's Valentine's Party, and I swiped the extras thinking I would make photo props later.  Who knew it would be so soon?!
  5. In addition, glue a small strip of cardstock over the chopstick after securing it to the prop to give it more surface area and keep it from separating from the prop so easily.
  6.  Make sure to alternate which side to attach your chopsticks to on the props.  For example, I attached the chopstick on the right side of the bow-tie and the left side of the hat so that the same child can hold both at once if they want to.

Happy Birthday Dr. Seuss!

Sharing this sassy project at some or all of these great parties: Under the Table and Dreaming, Totally Overflowing with Creativity, Three Mango Seeds, Classy Cutter, Serenity You, House of Hepworth, Skip to my Lou, LadyBug Blessings, Nap Time Creations, The Style Sisters, Polkadots on Pararde, Rae Gun Ramblings,Costal Charm, Not Just a Housewife, Domestically Speaking, The Shabby Creek Cottage, Sumos Sweet Stuff, The Gunny Sack, Gingersnap Crafts, Southern Lovely, Lil Luna, Someday Crafts, The NY Melrose Family, The DIY Dreamer, The Blackberry Vine, Homeworks, The Rustic Pig, Cornerstone Confessions, Kathe with an E, House on the Way, PJH Desgin, Glued to my Crafts, The Crafty Blog Stalker, Seven Alive, Made in a Day, Live Laugh and Love, A Creative Place, Have a Daily Cup of Mrs. Olson, Home and Gardens, It Happens In a Blink, I Gotta Create, Domestic Super Hero, All Pretty Things, Katie's Nesting Spot, 52 Mantels, Truly Lovely, Twinkle in the Eye, Happy Hour Projects, Six Sisters Stuff, Tutus and Tea Parties, Mop It Up Monday, Saturday Show and Tell, Moonlight and Mason Jars, The Scoop, Wow Us Wednesdays, Take-A-Look Tuesday, Share Your Stuff Tuesdays

Tuesday, February 12, 2013

Edible Photo Props for Boys!

 
Let's face it, Valentine's just doesn't get any sweeter than this!
 
Sheep and I came up with this darling edible photo prop idea while making lip-shaped cookies for her classroom, and knew we would need something for the boys as well.  Our lips were made with a delicious strawberry cookie recipe and what goes better with strawberries than chocolate?!
 
After some serious search time, I settled on a chocolate cutout cookie recipe from King Arthur Flour, but put my own spin on it because (as usual) time was of the essence and I didn't have all the ingredients it called for on hand.  You can check out the original version here and here's the version I used as well.  They are delicious I might add!
 
Chocolate Moustache Cutout Cookies
 
  • 1 cup sugar
  • 1 cup unsalted butter, room temperature
  • 1 teaspoon baking powder
  • 1 teaspoon vanilla extract
  • 3/4 teaspoon salt
  • 1 large egg
  • 1/4 cup Hershey's Special Dark Cocoa
  • 1/4 cup cocoa
  • 2 1/4 cups flour

  • Mix dry ingredients together in seperate bowl.  Cream butter and sugar.  Add egg and vanilla.  Add dry ingredients.  Chill dough.  Roll to 1/4-1/2" thickness for moustache cutouts.  Insert stick before baking.  Makes about 18 4" cookies.  Bake ay 375 degrees for 8 minutes.  Cool on pan for several minutes before removing to wire rack to cool completely.

    Since this idea was hatched, I have been on the hunt for a moustache cookie cutter locally (again, no time), but my clever sister suggested that I just cut out the lips and use the bottom to take off a small piece to form a moustache instead.  What can I say, it runs in the family!!


    Anyway, that's what I did!

     
    Voila!
     
     
    Trying to get a picture of the finished product proved a bit tricky, as my model was more interested in licking, kissing and nibbling the props!


    Oui, oui my little 'nekked' chef!  I supposed this would be your favorite holiday!
    Let's just say, it's a good thing I made extra!
    And I ended up with one that I could work with . . .
     
     
    and turn into the cutest card EVER too!
     
     
    Happy Valentine's Day Y'all!
     
    Sharing this Sassy Idea @ Sunday Showcase, Mop It Up Mondays, Meet Me Monday, Made by You Monday, Debbie Doo's Newbie Party, What's In the Gunny Sack, Take-A-Look Tuesday, Tuesday Tutorial, Wow Us Wednesdays, {Wow Me} Wednesday @ Gingersnap Crafts, Cowgirl Up, Whimsy Wednesdays, Pin It Wednesday, Show and Share, Overflowing with Creativity, Creative Me, Made U Look, It's a Hodgepodge Friday, Saturday Show & Tell, Weekend Showoff Party, Pin It Party @ Debbie Doo's, Strut Your Stuff Saturday, Tatertots & Jello
     

    Friday, February 1, 2013

    Edible Photo Props!


    Aren't these the sweetest?!   And they're not even 'perfect' yet, because I forgot to add the sparkling sugar before baking them!  This was just a test run, but it came out sooooo stinkin' cute that I couldn't wait to share!
     
     
    Sweetheart Cookies are a Valentine's Day tradition at our house, but this year I decided to try something a little different and cut them into lips instead of hearts - mainly because I saw these awesome lip-shaped cookies at my grocery store last year that appear to be made with a cookie mold rather than a cookie cutter and look amazing!  However, they did NOT taste amazing (which my Sweetheart Cookies do and you can grab the recipe here) so I wanted to replicate them using our recipe instead.
     
    Last year I was unable to find a lip-shaped cookie mold (grrrr), but my sweet MIL gave me a cookie cutter and told me to do my best.  Always good advice by the way!  I actually did find one this year, but it won't be here in time for the big day, so I started experimenting with what I had.
     

    Snacks routinely 'reorganizes' my kitchen and I couldn't seem to find the rolling pin.  Talk about making do with what you have . . . . !  Anyway,  I rolled these out a bit thicker than I would have otherwise to make sure I could draw the lip line without breaking the cookie in half.
     

    I baked a couple of  'test cookies' and then used a chopstick to indent the line for the lips once they came out of the oven and while they were still hot.
     

    Hmmmm.  Not sure I like the cracked edges at the lip line.
     

    So, on the next batch I decided to draw in the lip line before baking.
     

    At some point during this process, Sheep and I decided that they reminded us of the 'Brownie Smile' photo props we made for her Bridging Ceremony last Spring, and that gave us another idea . . .


    So, we added some craft sticks before baking!

     
    Still some cracking at the lip line (so perhaps she's old, or smokes, or both - ha!),
    but what a GREAT idea for Valentine's treats this year!
     

    Packaged in some cellophane with a cute ribbon at the bottom, these are sure to be a classroom favorite - even without using the cookie mold!  The craft sticks worked great and they are flat, so I'm thinking they slide into the cookies a little easier than a round popsicle stick or paper straw, but those would probably work as well.  Use what 'cha got!


    Of course now I want to find a moustache cookie cutter for the boys - and a chocolate rolled cookie recipe too!  Link in the comments if you've got a good one to share!


    Happy Valentine's Day Y'all!