Pages

Wednesday, February 27, 2013

Grapefruit Brulee


Mmmmm, mmmmm, mmmmm - this is a quick and yummy dessert to enjoy this time of year!
 
I think I have already mentioned that winter is citrus season here in Texas and thanks to our neighbors, we have a bumper crop to enjoy all season long. And this recipe is as easy as 1-2-3!
 
 
1.  Slice your grapefruit in half crosswise.
 
2.  Spread a generous amount of brown sugar across the top.
 
 
3.  Carmelize the sugar using either a small kitchen torch (LOVE mine!) or your broiler!
 
 
The only thing left to do now is enjoy!
 
This amazingly simple sweet is good on it's own, or try it with a small scoop of vanilla bean ice cream for a truly decadent dessert!  You can even convert non-grapefruit lovers with this tasty treat!
 
It is Just. That. Good.
 
 
Sharing this Sassy Sweet @ Sunday Showcase, Mop It Up Mondays, Meet Me Monday, Made by You Monday, Debbie Doo's Newbie Party, What's In the Gunny Sack, Take-A-Look Tuesday, Tuesday Tutorial, Wow Us Wednesdays, {Wow Me} Wednesday @ Gingersnap Crafts, Cowgirl Up, Off the Hook, Whimsy Wednesdays, Pin It Wednesday, Show and Share, Overflowing with Creativity, Creative Me, Made U Look, It's a Hodgepodge Friday, Saturday Show & Tell, Weekend Showoff Party, Pin It Party @ Debbie Doo's, Strut Your Stuff Saturday, Tatertots & Jello


Wednesday, February 20, 2013

Tarragon Roasted Asparagus

 
It's Wednesday . . . What's for dinner at your house?
 
By Wednesday I am usually struggling with a menu, despite my best efforts to plan the week in advance.  So I thought I would share one of our 'go-to' sides that's simple, super tasty and pairs well with just about anything.  There are no real exact measurements for this recipe either, so don't be afraid to experiment with the ingredients and find the flavor combination that you like best!
 
 
Tarragon Roasted Asparagus

1-2 bundles of asparagus, washed and prepped
Olive Oil
Balsamic Vinegar
Dried Tarragon
Salt and pepper

Preheat oven to 400 degrees. Once they are washed and patted dry, snap off the woody ends and place on a foil-lined baking sheet in a single (or mostly single) layer.  Drizzle with olive oil and balsamic vinegar.  Sprinkle with dried tarragon.  Toss to coat thoroughly.  Roast in preheated oven for 20 minutes, stirring halfway through.  Serve hot!


These days I always buy two bundles of asparagus for my family of 4, as they shrink considerably once they are roasted and you really can't eat enough of this delicious veggie!   And I love, love, love balsamic vinegar and tarragon, so I go heavy on both, especially since some will get left behind on your foil.  So yummy!

Why not try it tonight?!
 

Thursday, February 14, 2013

Texas Chocolate Crackles!

 
Did I mention that World Thinking Day is just around the corner?  It's an annual day for girl scouts and girl guides to celebrate the unique connection they have with girls all around the world through scouting.   How awesome is that?!  Our service unit commemorates the day with an 'Around the World' event that allows girl scouts to 'visit' other countries (hostessed by other troops) and learn a little about the geography, language, culture, food and scouting of course!
 
A small sample of food from your country is expected to be served at your booth.   Last year we had Mexico as our country and a local restaurant donated chips and Spanish rice, but the girls wanted to serve something sweet this year, so no chance to hit up Outback Steakhouse for something 'on he barbie' - ha!  We also had a couple of connections in 'the land down under' who were willing to send us some Girl Guide 'Biscuits' but the shipping turned out to be prohibitive.  So, after scouring several library books and more than a couple of websites, we settled on THESE delicious Australian confections!
 
 
Aussie Chocolate Crackles
(a.k.a. Chocolate Bubble Cakes)
  • Icing sugar -- 1 cup
  • Cocoa powder -- 1/2 to 2/3 cup
  • Rice bubbles -- 4 cups
  • Unsweetened coconut, dried and shredded -- 1 cup
  • Copha -- 10 ounces, or about 1 1/4 cups
  • Hundreds and Thousands
Sift together the icing sugar and cocoa powder into a large bowl. Stir in the rice bubbles and dried coconut.  Melt the coconut oil in a small saucepan over low flame. Stir the dry ingredients into coconut oil until well mixed.  Scoop small portions of the crackle mix into paper muffin cups.  Sprinkle with hundreds and thousands.  Chill in the refrigerator until firm and serve.

The girls and I had lots of fun figuring out what all the ingredients were here in the States, and I had to make a few adjustments after seeing the price of coconut oil, so here's the recipe again with our 'Texas substi-Two-tions'!  They are easy and fun to make so give 'em a go mate!


Texas Chocolate Crackles 
  • 1 C powdered sugar
  • 2/3 C cocoa (I used Hershey's Special Dark cocoa because it's what I had on hand)
  • 4 C Rice Krispies cereal
  • 1 1/4 C Butter-flavored Crisco
  • 1-2 tsp. coconut extract
  • Sprinkles for garnish
Add dry ingredients to a large bowl and toss together.   Heat Crisco in microwave for about 1 minute or until just melted.  Pour over dry ingredients.  Add coconut extract and mix until all cereal is well coated with chocolate.  Use small melon baller to scoop cereal into mounds and drop into mini-muffin cups.  Top with sprinkles and let cool completely.  Enjoy!

Makes 48 mini muffin treats


Even though World Thinking Day is February 22nd, we'll be celebrating this weekend - yum!
 
What does your troop or service unit for Thinking Day?
 

Tuesday, February 12, 2013

Bottle Cap Swaps!

 
Good day mates!  Well, today is Fat Tuesday, but I am miles away from the revelry this year, so I thought I might take this evening to show you what else we've been getting ready for besides Lent!
 
February 22nd is World Thinking Day for Girl Scouts and Girl Guides and each year our service unit hosts an "Around the World" event, complete with displays of food, currency, clothing, customs and of course, SWAPS!  No Girl Scout event would would be complete without these Special Whatchamacallits Affectionately Pinned Somewhere!!  And this year our Brownies chose to learn about Australia!
 
 
As a leader of first year Brownies (That's 7 and 8-year-olds to you), the challenge is keeping the SWAPS simple enough for the girls to actually do themselves, because let's face it, about 85% or more of the SWAP ideas out there eventually involve hot glue.  And though we've tried all sorts of alternatives, nothing works like hot glue to get beads and felt and pom poms and foam shapes and pipe cleaners and really anything to come together into something wonderful to Share With A Pal.

And frankly, my fingertips have just recovered from the candycanes and lollipops at Christmastime!

So, my clever co-leader and I decided to forgo the origami kangaroos and pom-pom koala bears for our Australia-inspired swaps and went with a simple bottle cap craft instead.  Especially since about 150-200 traveling girl scouts will visit our country on Thinking Day and each of them will want a SWAP!

The most expensive part of this SWAP was the bottle caps, which we bought in packages of 50 from Michaels.  Otherwise, we simply printed out some small, round art on solid sheets of sticker paper and let the girls punch, peel and stick!

 
Some worked solo while others preferred an assembly-line technique but both styles got the job done.  The bottlecaps came with a pre-punched hole in the rim, which also made adding a safety pin a snap!  We put our Smiling Bear stickers on the inside and a GS Thinking Day sticker on the back, complete with the year and our troop number!  I made these in Power Point using my tried and true 'Ghetto Graphics' technique, but if you want more info on how to make these yourself, leave me a note in the comments and I will try to help you out!
 
 
Incidentally, if you have a chance to check out www.smilingbear.com, I highly recommend it.  The goal of Smiling Bear is to make the world a better place by getting people to smile more!  Sounds a lot like a girl scout (or 'guide' as they say in Oz) to me!!  Their website has tons of cool information, photos, merchandise, FREE downloads and it's very own blog too!  We have fallen in love with Smiling Bear and I know you will too!
 
 
Cheerio mates!
 

Edible Photo Props for Boys!

 
Let's face it, Valentine's just doesn't get any sweeter than this!
 
Sheep and I came up with this darling edible photo prop idea while making lip-shaped cookies for her classroom, and knew we would need something for the boys as well.  Our lips were made with a delicious strawberry cookie recipe and what goes better with strawberries than chocolate?!
 
After some serious search time, I settled on a chocolate cutout cookie recipe from King Arthur Flour, but put my own spin on it because (as usual) time was of the essence and I didn't have all the ingredients it called for on hand.  You can check out the original version here and here's the version I used as well.  They are delicious I might add!
 
Chocolate Moustache Cutout Cookies
 
  • 1 cup sugar
  • 1 cup unsalted butter, room temperature
  • 1 teaspoon baking powder
  • 1 teaspoon vanilla extract
  • 3/4 teaspoon salt
  • 1 large egg
  • 1/4 cup Hershey's Special Dark Cocoa
  • 1/4 cup cocoa
  • 2 1/4 cups flour

  • Mix dry ingredients together in seperate bowl.  Cream butter and sugar.  Add egg and vanilla.  Add dry ingredients.  Chill dough.  Roll to 1/4-1/2" thickness for moustache cutouts.  Insert stick before baking.  Makes about 18 4" cookies.  Bake ay 375 degrees for 8 minutes.  Cool on pan for several minutes before removing to wire rack to cool completely.

    Since this idea was hatched, I have been on the hunt for a moustache cookie cutter locally (again, no time), but my clever sister suggested that I just cut out the lips and use the bottom to take off a small piece to form a moustache instead.  What can I say, it runs in the family!!


    Anyway, that's what I did!

     
    Voila!
     
     
    Trying to get a picture of the finished product proved a bit tricky, as my model was more interested in licking, kissing and nibbling the props!


    Oui, oui my little 'nekked' chef!  I supposed this would be your favorite holiday!
    Let's just say, it's a good thing I made extra!
    And I ended up with one that I could work with . . .
     
     
    and turn into the cutest card EVER too!
     
     
    Happy Valentine's Day Y'all!
     
    Sharing this Sassy Idea @ Sunday Showcase, Mop It Up Mondays, Meet Me Monday, Made by You Monday, Debbie Doo's Newbie Party, What's In the Gunny Sack, Take-A-Look Tuesday, Tuesday Tutorial, Wow Us Wednesdays, {Wow Me} Wednesday @ Gingersnap Crafts, Cowgirl Up, Whimsy Wednesdays, Pin It Wednesday, Show and Share, Overflowing with Creativity, Creative Me, Made U Look, It's a Hodgepodge Friday, Saturday Show & Tell, Weekend Showoff Party, Pin It Party @ Debbie Doo's, Strut Your Stuff Saturday, Tatertots & Jello
     

    Sunday, February 3, 2013

    XOXO - A Valentine's Tic Tac Toe!


    I'm so excited to be offering my first ever FREE printable to all my sweet friends for Valentine's Day!  This is a quick, easy and inexpensive idea that's perfect for classroom treats!


    In years past, I have almost always done photo cards (featuring MY little sweethearts of course) but between our family vacation last month and an out-of-town obligation next week, pictures just weren't going to happen.  But you know what they say . . . Desperation, no, procrastination - uhm, wait . . . oh yes, "Necessity is the mother of invention."  Or PIN-vention in this case anyway!
     

    This is definitely a 'copycat' project I pinned earlier this week in anticipation of our upcoming Valentine's activities, including TWO classroom parties now that both Sheep and Snacks are both in school!  And a big shout out to Jodi for the idea and instructions!  You can check out the original version and other great ideas for kids at www.JodieFitz.com.
     
    Valentine's Tic Tac Toe
    Valentine's pinspiration from JodiFitz.com
    Honestly, I would have just used Jodi's version myself because it is adorable, but I have been using my color printer A LOT lately and decided to try making my own version without the colored background to conserve ink.  I also wanted to personalize it with Sheep's name . . . and add a cute poem for the instructions.  I know, it's a sickness of some sort. {Grin.}
     
     
    Ironically, the final version ended up with some cute, heart, COLORED clipart as the background - so much for conservation!  I did make a version without the background though, so for those without a color printer or who actually do want to conserve their ink, it will still work for ya!
     

    These little treats print up four to a page and cutting lines are included to help you out!  They are approximately 4" X 3" and fit perfectly in a standard-size treat bag you can find in the candy or cupcake aisle.  Sheep stuffed and I stapled and together we knocked out 24 of these in under 15 minutes - now that's sweet!


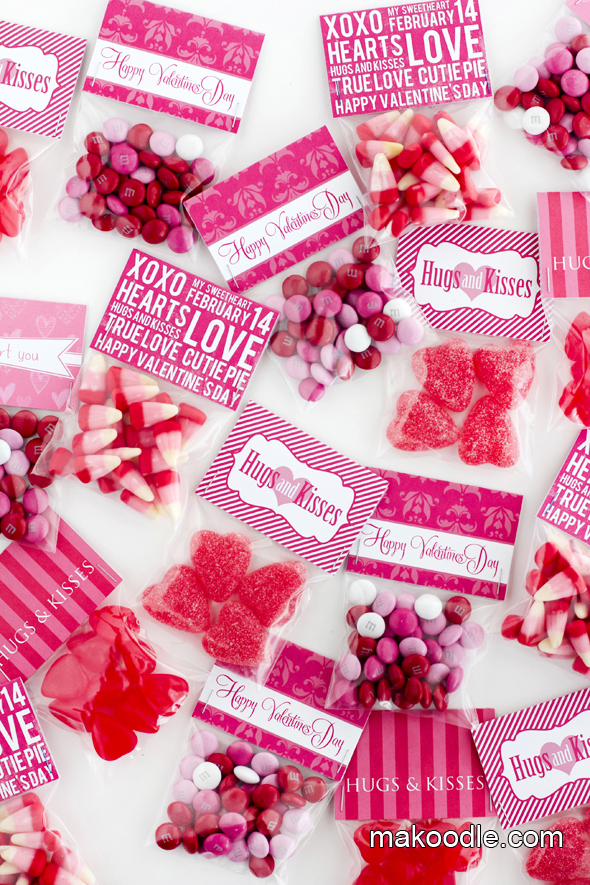
    Now, I know what you might be thinking . . . While these treats are pretty darn cute, they could use a cute topper as well to really 'complete' the project.  I thought the same thing (I wanted to add X and O stickers on the kisses too  - Like I said, it's a sickness), but Sheep seemed satisfied with them 'as is', so 'as is' they are.  My over-embellishing genes have obviously been diluted by her father!  But if you are similarly afflicted so inclined, you can grab these adorable, free, printable treat toppers here and they would be a fabulous addition!

    DIY Valentine's Day Free Printable Treat Bag Toppers
     
    This is my first attempt at file-sharing, via Keep & Share, so let's hope this works!


    Happy Valentine's Yall!
     

    Friday, February 1, 2013

    Edible Photo Props!


    Aren't these the sweetest?!   And they're not even 'perfect' yet, because I forgot to add the sparkling sugar before baking them!  This was just a test run, but it came out sooooo stinkin' cute that I couldn't wait to share!
     
     
    Sweetheart Cookies are a Valentine's Day tradition at our house, but this year I decided to try something a little different and cut them into lips instead of hearts - mainly because I saw these awesome lip-shaped cookies at my grocery store last year that appear to be made with a cookie mold rather than a cookie cutter and look amazing!  However, they did NOT taste amazing (which my Sweetheart Cookies do and you can grab the recipe here) so I wanted to replicate them using our recipe instead.
     
    Last year I was unable to find a lip-shaped cookie mold (grrrr), but my sweet MIL gave me a cookie cutter and told me to do my best.  Always good advice by the way!  I actually did find one this year, but it won't be here in time for the big day, so I started experimenting with what I had.
     

    Snacks routinely 'reorganizes' my kitchen and I couldn't seem to find the rolling pin.  Talk about making do with what you have . . . . !  Anyway,  I rolled these out a bit thicker than I would have otherwise to make sure I could draw the lip line without breaking the cookie in half.
     

    I baked a couple of  'test cookies' and then used a chopstick to indent the line for the lips once they came out of the oven and while they were still hot.
     

    Hmmmm.  Not sure I like the cracked edges at the lip line.
     

    So, on the next batch I decided to draw in the lip line before baking.
     

    At some point during this process, Sheep and I decided that they reminded us of the 'Brownie Smile' photo props we made for her Bridging Ceremony last Spring, and that gave us another idea . . .


    So, we added some craft sticks before baking!

     
    Still some cracking at the lip line (so perhaps she's old, or smokes, or both - ha!),
    but what a GREAT idea for Valentine's treats this year!
     

    Packaged in some cellophane with a cute ribbon at the bottom, these are sure to be a classroom favorite - even without using the cookie mold!  The craft sticks worked great and they are flat, so I'm thinking they slide into the cookies a little easier than a round popsicle stick or paper straw, but those would probably work as well.  Use what 'cha got!


    Of course now I want to find a moustache cookie cutter for the boys - and a chocolate rolled cookie recipe too!  Link in the comments if you've got a good one to share!


    Happy Valentine's Day Y'all!