Not long ago I posted a rant about my misadventures in applique along with some ideas for machine applique on a burpcloth. Several of you had questions about how to use those techniques on a t-shirt or onesie bodysuit instead, so I've decided to follow up. Did you know you that you aren't allowed to call it a onesie if it's not Gerber brand? Well, in case you didn't - you aren't! So, now ya know!! And don't ask me how I know. Just trust me on this - ha!
Anyway, appliquing on ready-made garments was indeed one of the biggest reasons I wanted an embroidery machine, but darn it if there isn't much out there in the way of how-to's or tutorials, at least there wasn't when I started two years ago. So, today I thought I would walk you through MY process (because I'm sure there are others) for machine applique on tees and bodysuits, in hopes that you might benefit from some of my mistakes lessons learned!
And right about now seems the appropriate time to give a big shout out and thank you to my own mentors (and friends), Michelle @ Cutesy Cloths (is on vacation right now btw), Anne @ Anne Michelle Designs and Emily @ LePetit Poisson, who still answer my calls for 'HELP!'
OK, so you've picked out your garment and you've dowloaded your design and put it on your jump drive so that it's on your machine. But how exactly to get that fabulous design stitched out . . .
Step 1: Find the center of your garment by folding it in half and ironing it, pressing in a crease along the vertical center. You will determine your horizontal center in the next steps.
Step 2: Use the height of the design (in this case 185 mm) and divide by 2. This is how far down on the grament you will need to go from where you want the top of your design to be.
Step 3: Measure from the top placement of your design to the center of your design from above and mark with a washable fabric pen.
Step 4: I attach my hoop at this point and use my machine to determine (and adjust if necessary) where the center point of my design is and make a hole through the stabilizer to mark it.
Step 5: Turn your garment inside out and place your first pin through the center mark and into the center mark on the stabilizer. I do this on my ironing board so that i can just stick the pin in and line it up with the hole in the stabilizer beneath. Then straighten and pin your shirt well above and below the design area to hold it in place on the hoop. I never hoop anything, even flat things like burp cloths, but this is how I do it.
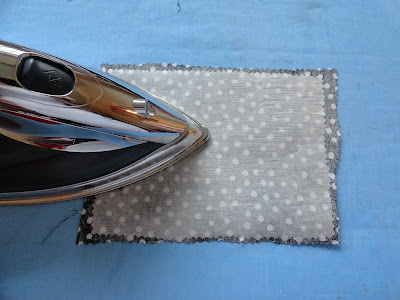
Step 6: Cut out your fabric using the dimensions from the design, allowing some extra just in case. Cut out a similar sized piece of double sided fusible web (Wonder Under on the roll) and fuse to the underside of the fabric following the manufacturer's instructions. Let cool and peel off the backing. the fusible web prevents fraying during machine applique and wrinkling of your applique fabric after washing. I think it's a must have!!
Step 7: Machine stitch your fabric to your garment, using your hands to hold your garment out of the way. By the way, I use a BALL POINT embroidery needle to applique on knit fabrics like tees and bodysuits. I found that regular point needles puncture the fabric, rather than slipping in between the weave, and in some cases actually cause the applique to pull away from the garment. That was bad. Go ball point.
Step 8: Use a pair of curve tipped snippers to trim your applique design. This pair is spring loaded and I bought them in the Viking Store at Joann's. I LOVE them!!
Here's what your trimmed design will look like. See how closely these little snippers trim - awesome!!
Step 9: Once your machine has finished the applique, turn your garment right side out and press, using a pressing cloth and steam, to fuse the appliqued design to the tee itself. I use a spray bottle to wet my pressing cloth so that I don't have to worry about switching back and forth with water in my iron. I will be the first to admit that I am not the neatest crafter in Texas, and working with so much fusible products greatly increases your chances of getting something sticky on your iron at some point. I have gotten to where I always use the pressing cloth so I don't accidentaly ruin a great design with something sticky from my iron right at the end - uugh!
Step 10: No picture of it, but depending on the design and how it stitched out on the back (were thee any rough spots, tangles of thread from a break, etc.) I fuse a Pellon thin, mesh interfacing to the back, covering the stitching of the design. On onesies and small children's garments, I take extra care to include this for comfort's sake. On lettering, I also use Fray-Check where I cut the jump stitches.
Just in case.
So now you know! Happy Applique-ing!
Showing off my Sassy Pants at Mine for the Making and It's a Hodgepodge Life


Oh my! Those are the cutest family shirts EVER!! :)
ReplyDeleteWhy thank you! I'd say they're almost as cute as the family I made them for . . . almost!
DeleteCute good job you just get better and better at this!
ReplyDelete